A short pixie can feel polished, modern, and manageable while still leaving enough length to shape around the face. From wispy fringe to sculpted side pieces, these layered pixie hairstyles offer practical ways to highlight the eyes, soften the hairline, and create movement without relying on a high-maintenance cut.
1. Side-Swept Pixie with Feathered Bangs
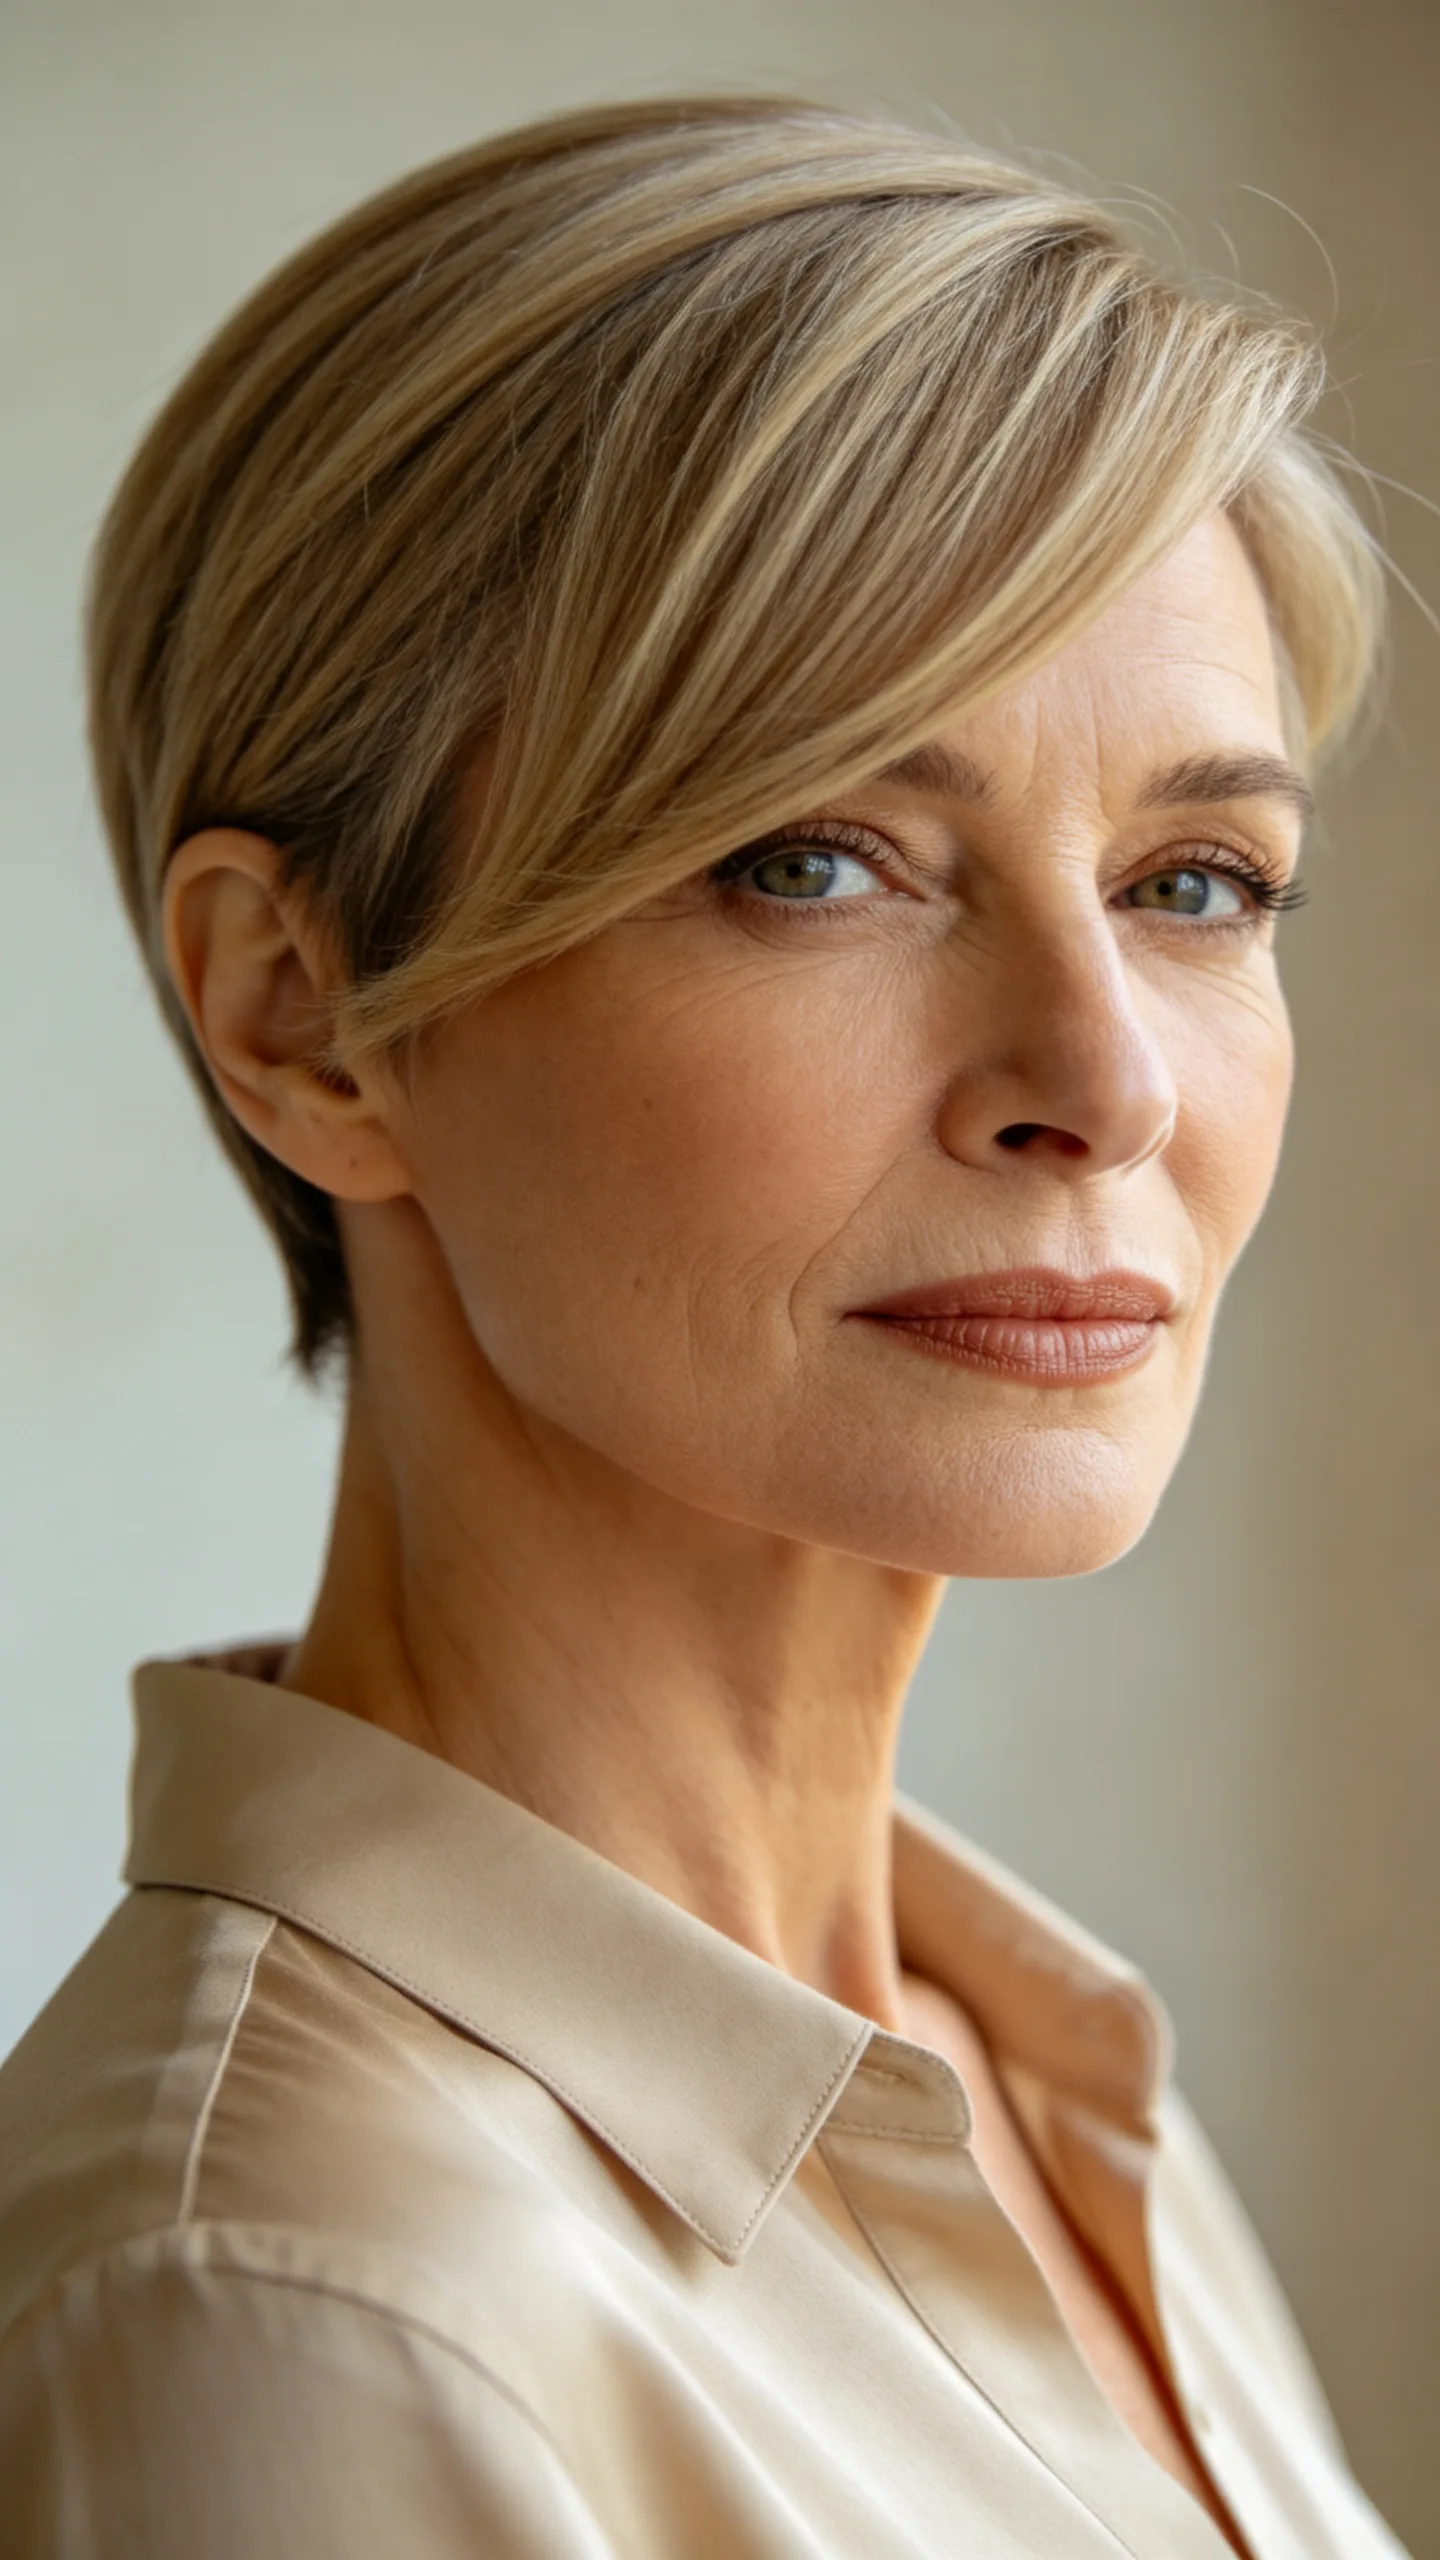
A side-swept pixie combines short, tapered sides with longer layers across the forehead. Feathered bangs create a light frame around the eyes and cheekbones rather than forming a heavy, straight line.
Ask your stylist to keep the fringe long enough to sweep diagonally and blend into the temple area. Style it with a small amount of lightweight mousse, then direct the bangs to one side using a vent brush or your fingers.
2. Tapered Pixie with Soft Temple Pieces
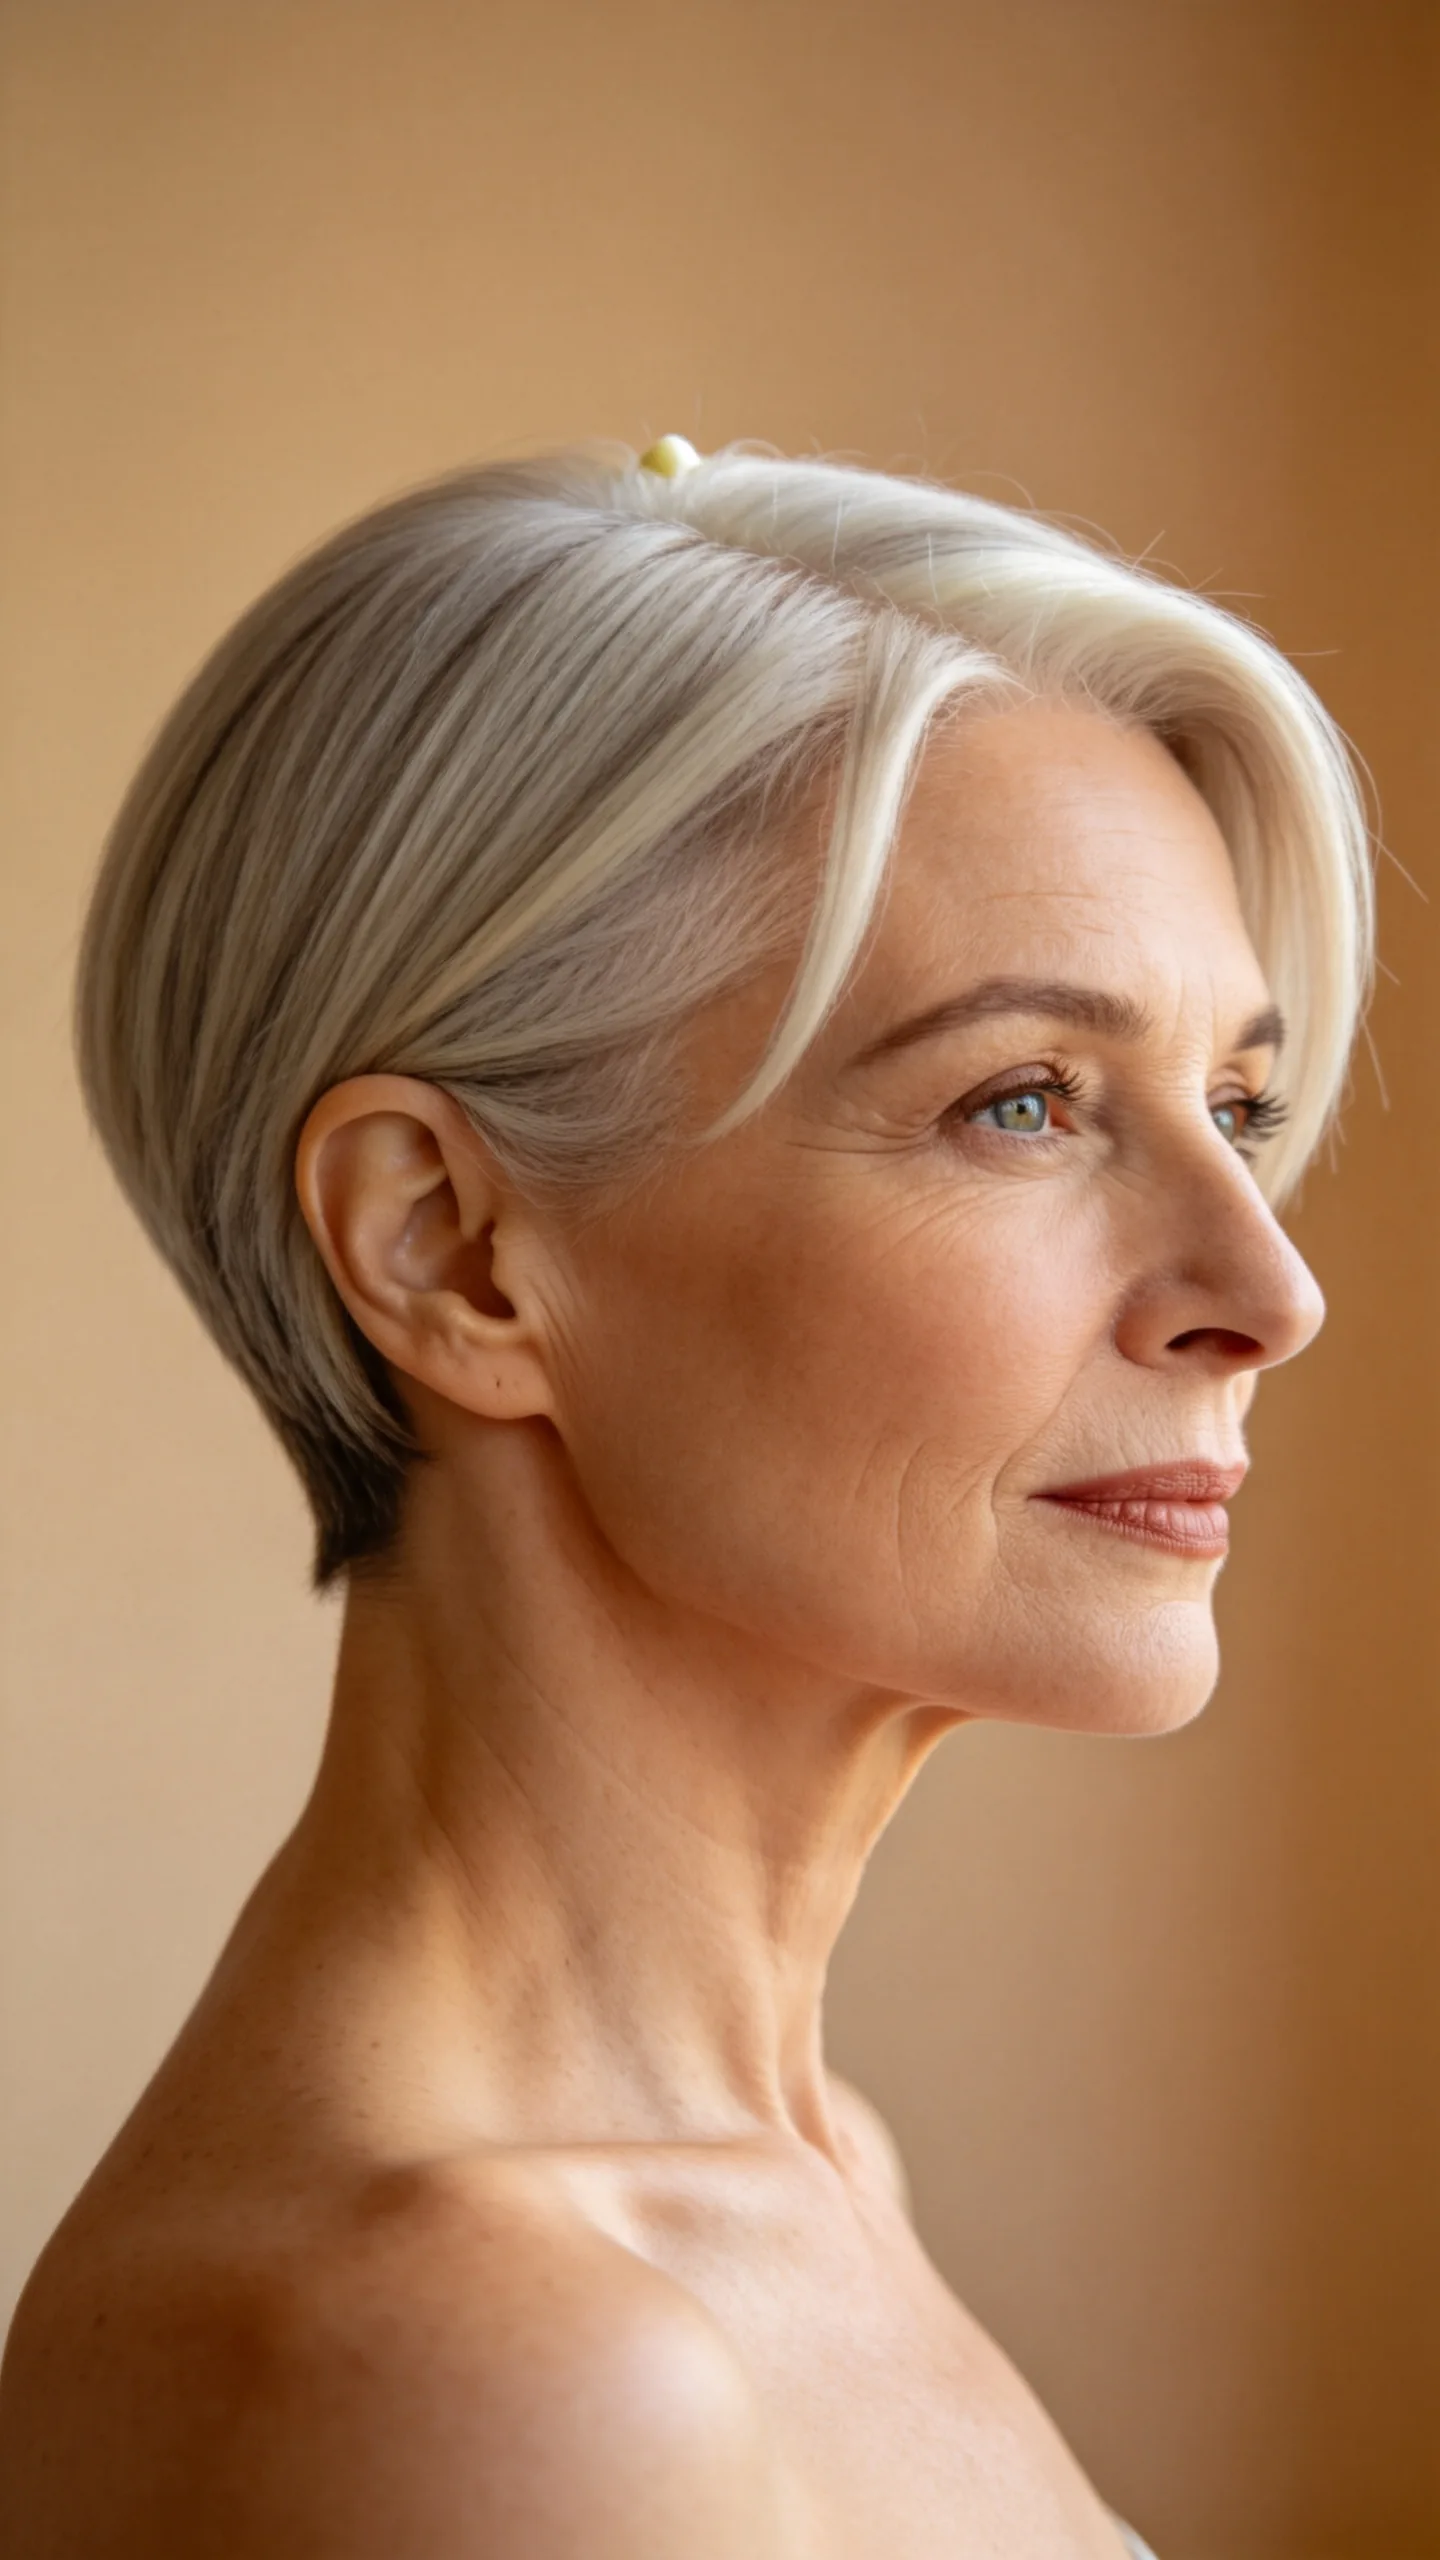
This close-cut pixie is neatly tapered at the nape and around the ears, with delicate pieces left slightly longer at the temples. Those slim layers add softness while preserving the clean outline of a classic short haircut.
The style works especially well for straight or softly wavy hair that holds a defined shape. Use a pea-sized amount of styling cream to separate the temple pieces, taking care not to flatten the volume at the crown.
3. Textured Silver Pixie with Wispy Fringe
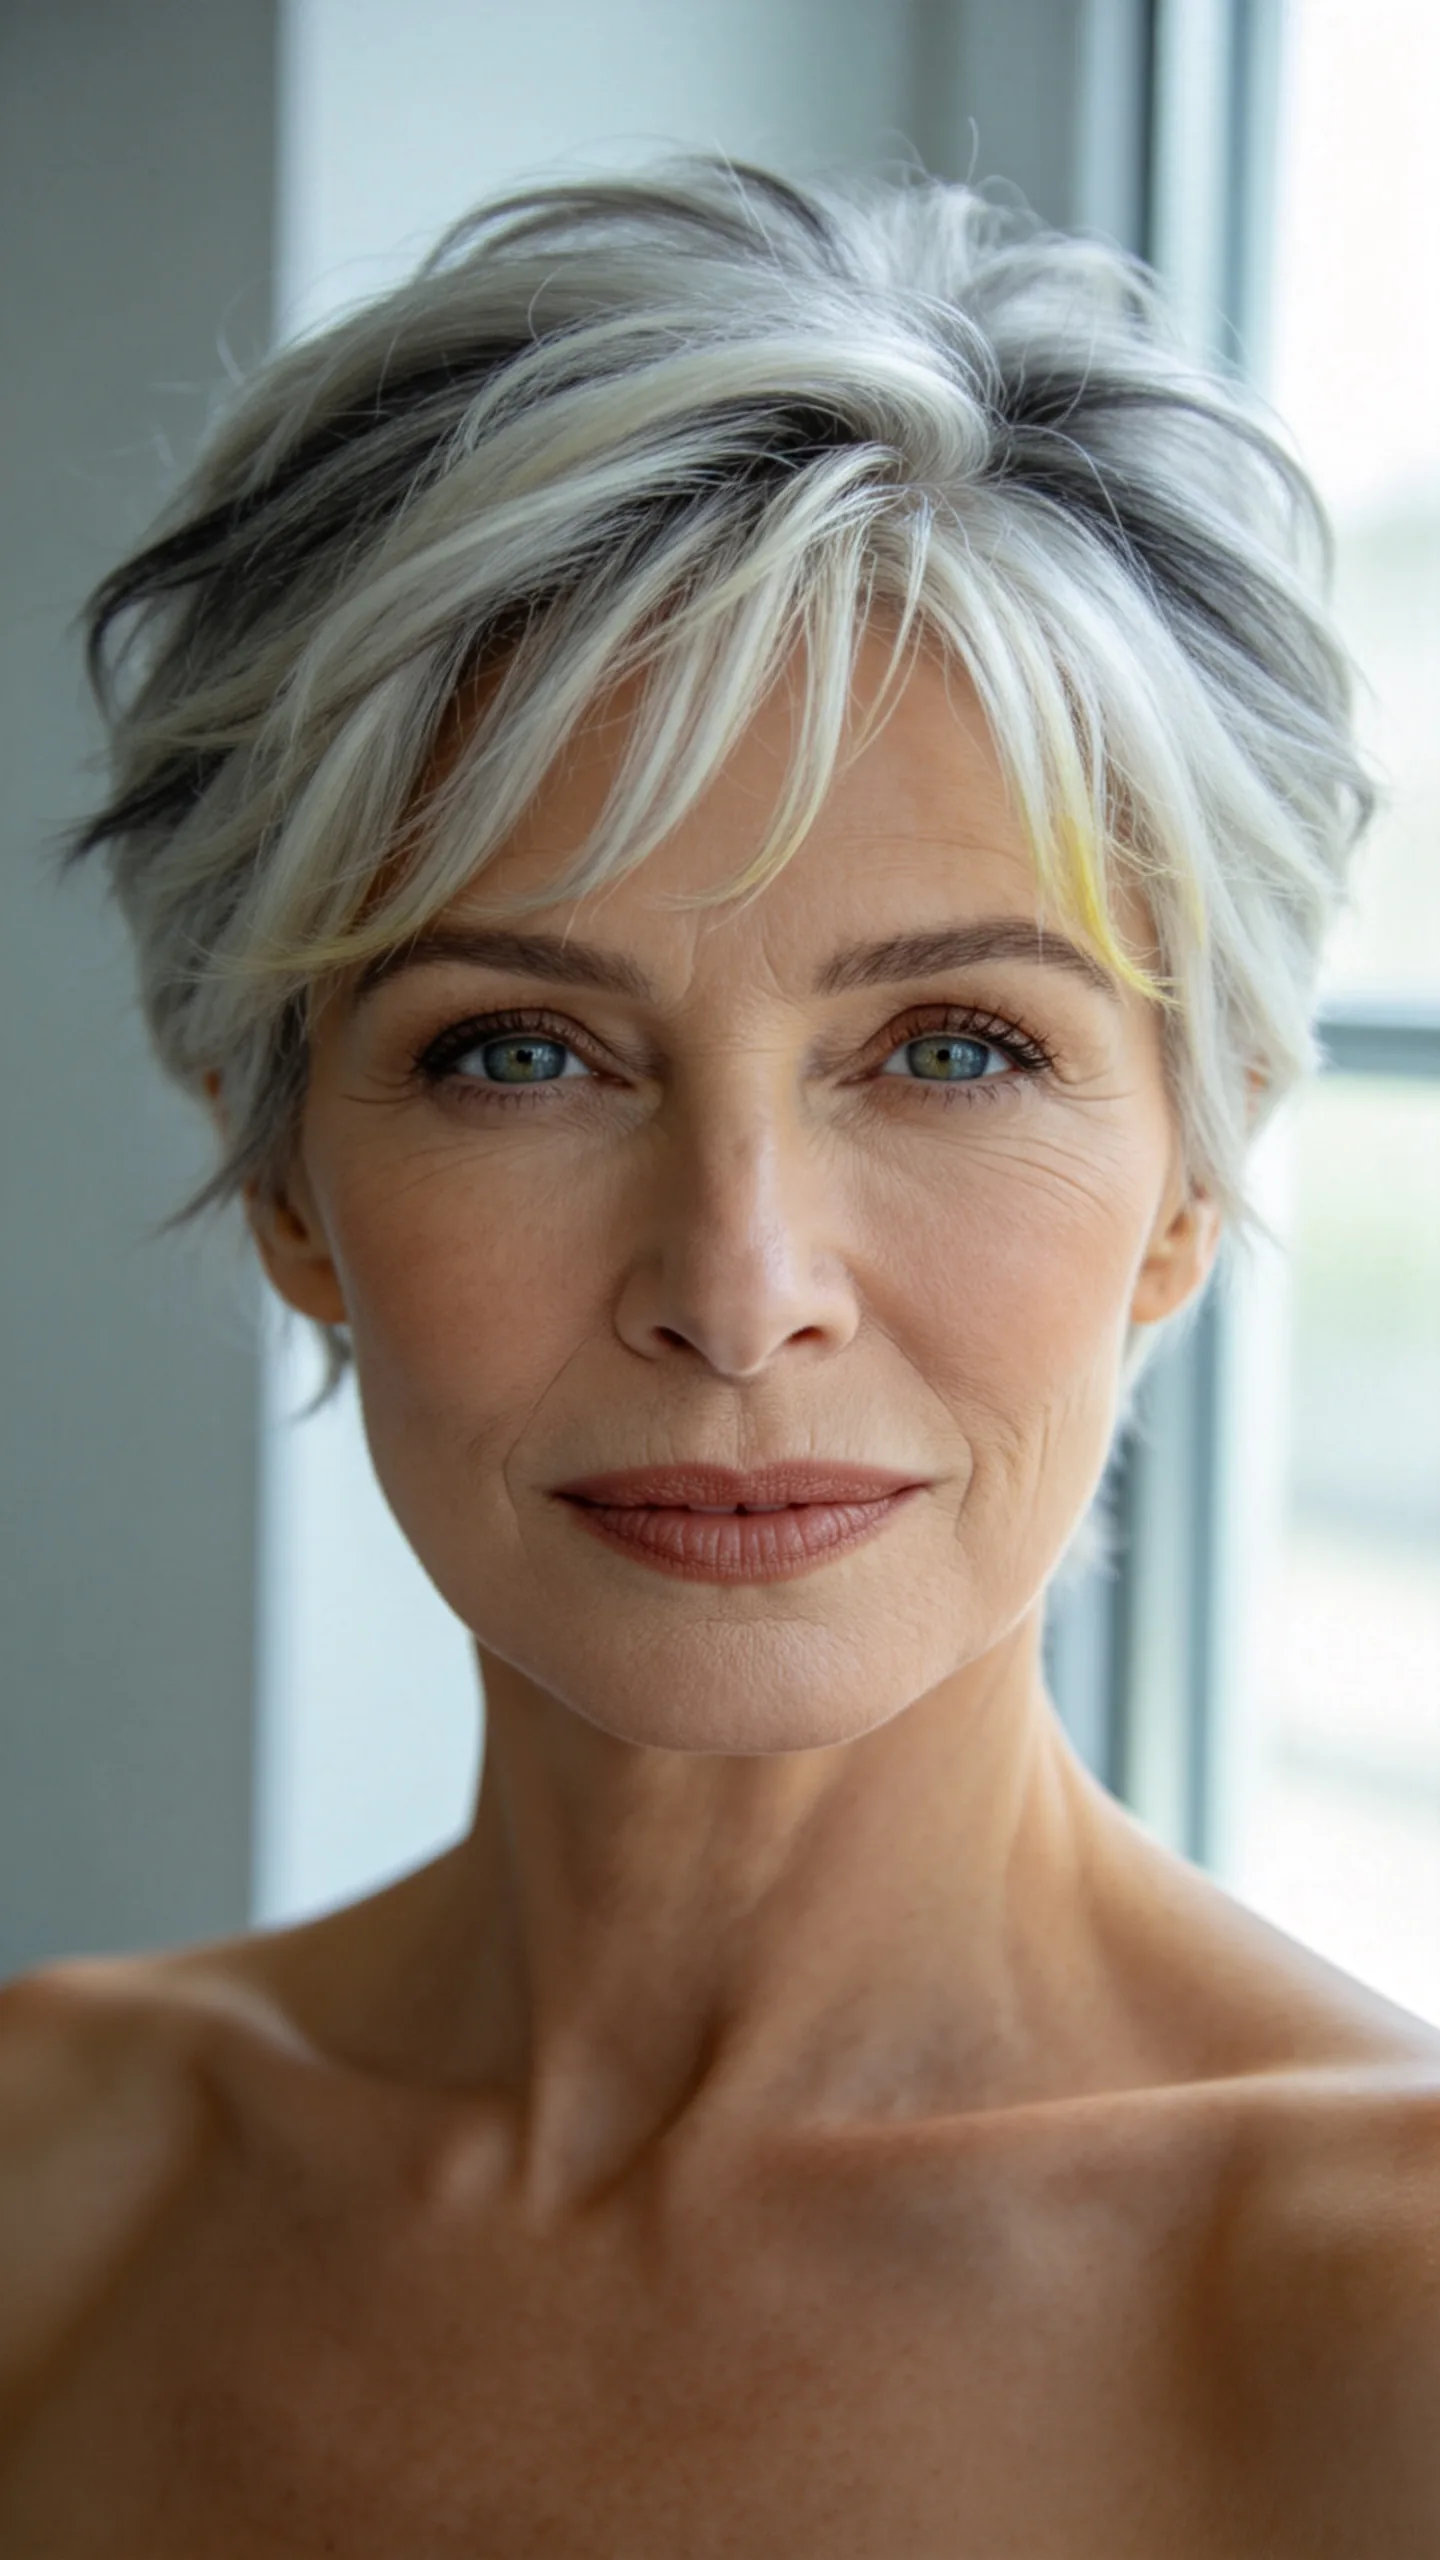
A textured silver pixie makes natural gray, white, or salt-and-pepper tones part of the design. Choppy crown layers create dimension, while a wispy fringe breaks up the forehead and draws attention toward the eyes.
A violet-toned shampoo used occasionally can help reduce unwanted yellow tones in lighter gray hair. For daily styling, work a light matte paste through dry hair and pinch individual layers around the fringe and sides.
4. Long-Layered Pixie with a Deep Side Part
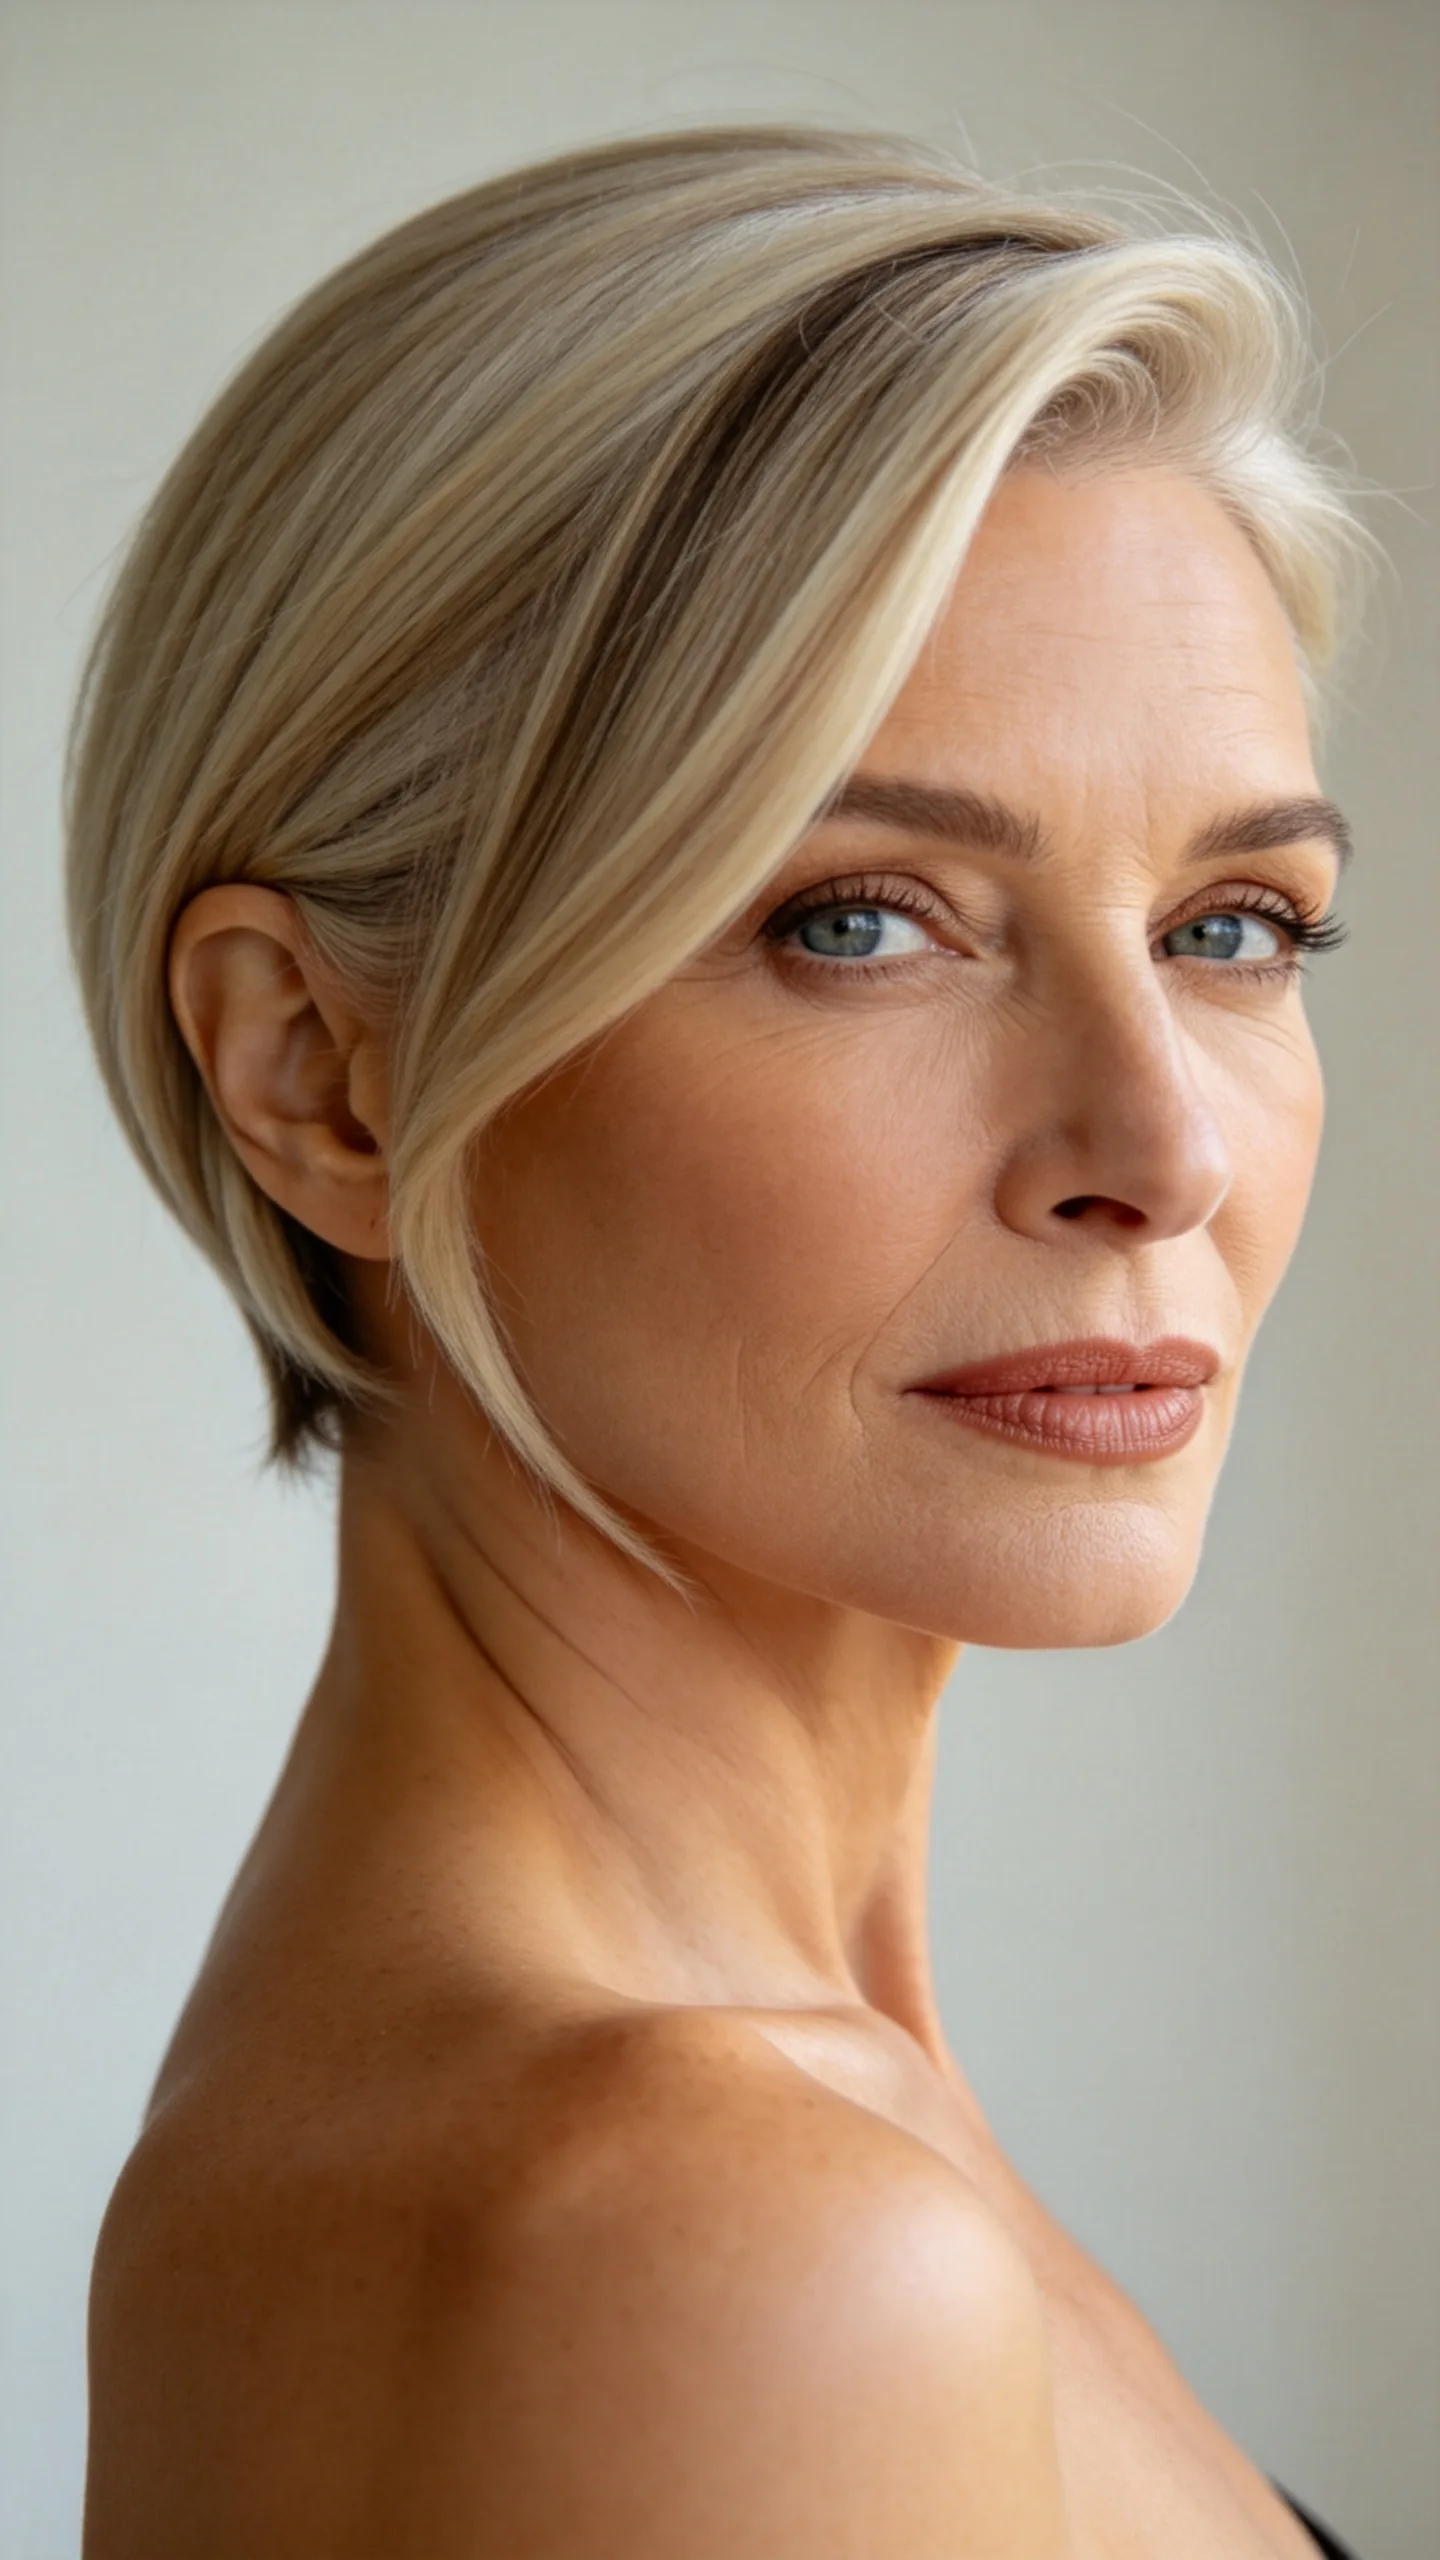
A deep side part gives a longer pixie a distinct shape, with one side sitting close to the head and the other forming a sweeping face-framing section. Graduated layers prevent the longer top from looking bulky.
This cut can visually balance round, square, or full face shapes by introducing a diagonal line across the forehead. Blow-dry the top away from the part with a small round brush, then tuck the shorter side behind the ear for contrast.
5. Curly Pixie with Face-Framing Tendrils
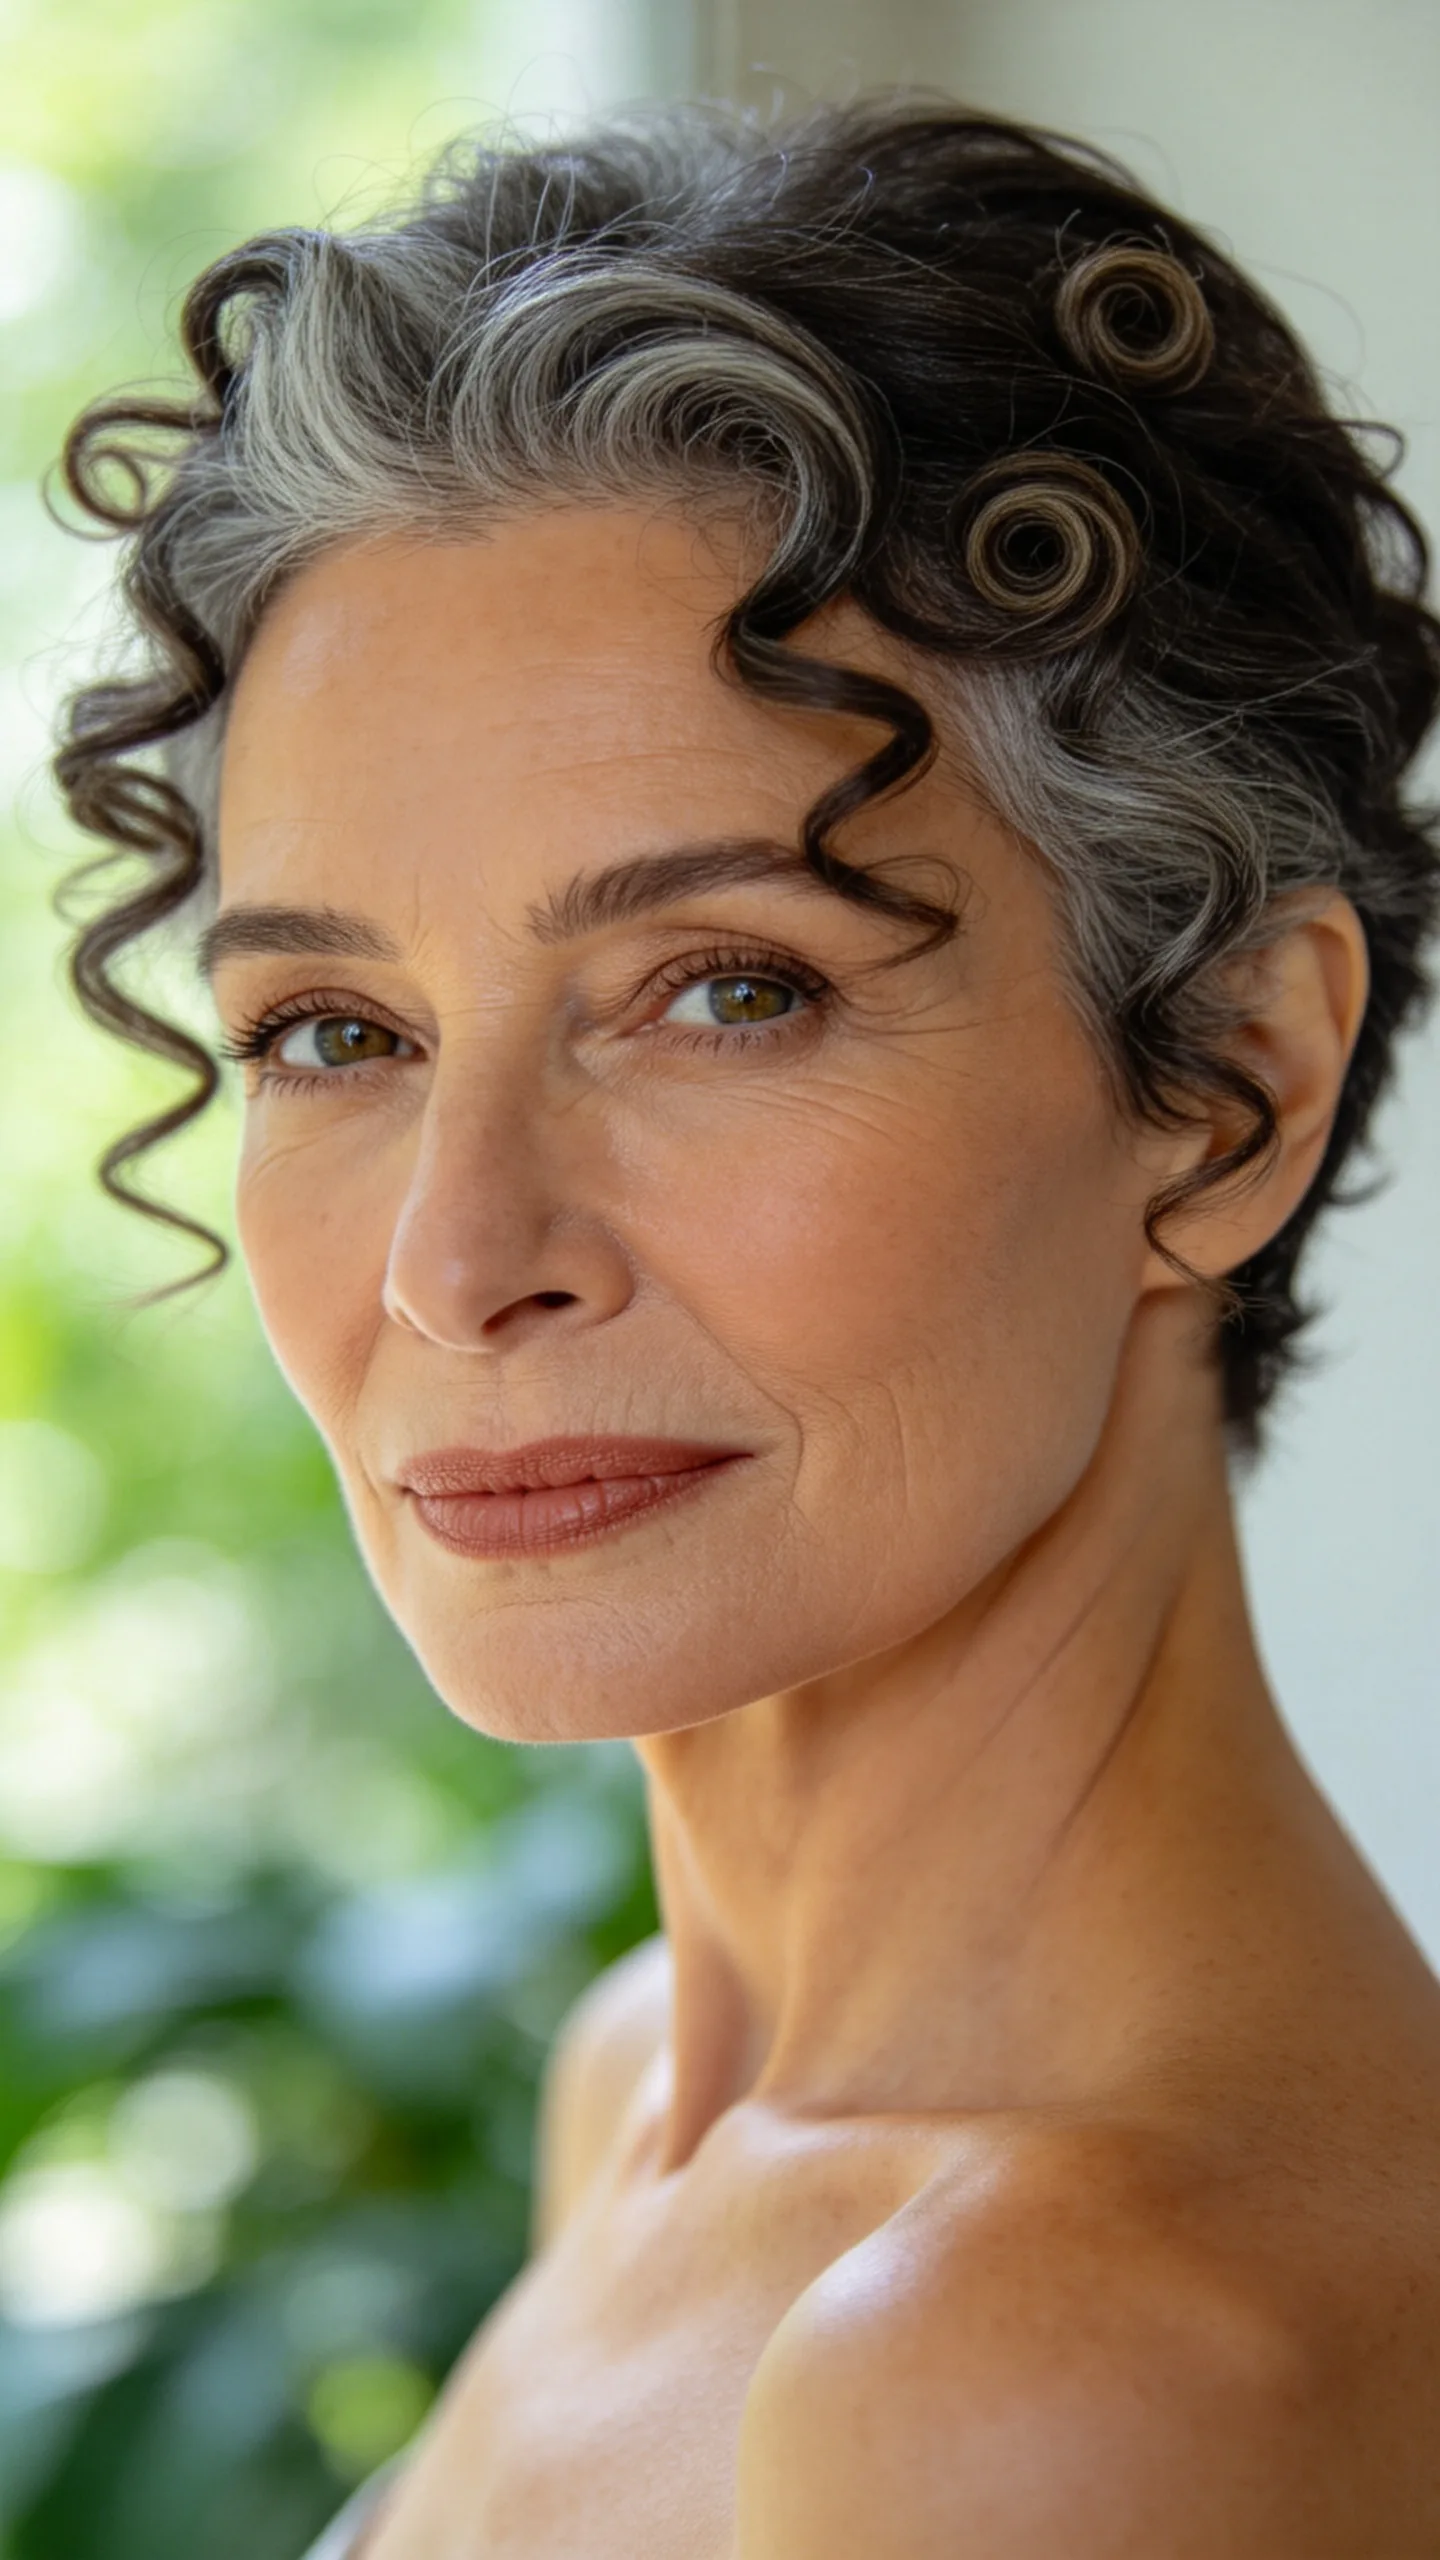
A curly pixie keeps natural curls cropped at the back while leaving a few spirals longer around the forehead and temples. The result is a compact silhouette with movement concentrated near the face.
Ask for curl-by-curl shaping so the front tendrils fall at flattering points when dry. Apply curl cream to damp hair, scrunch gently, and air-dry or use a diffuser on low heat to maintain definition without creating excess volume.
6. Layered Pixie Bob with Cheekbone-Length Pieces
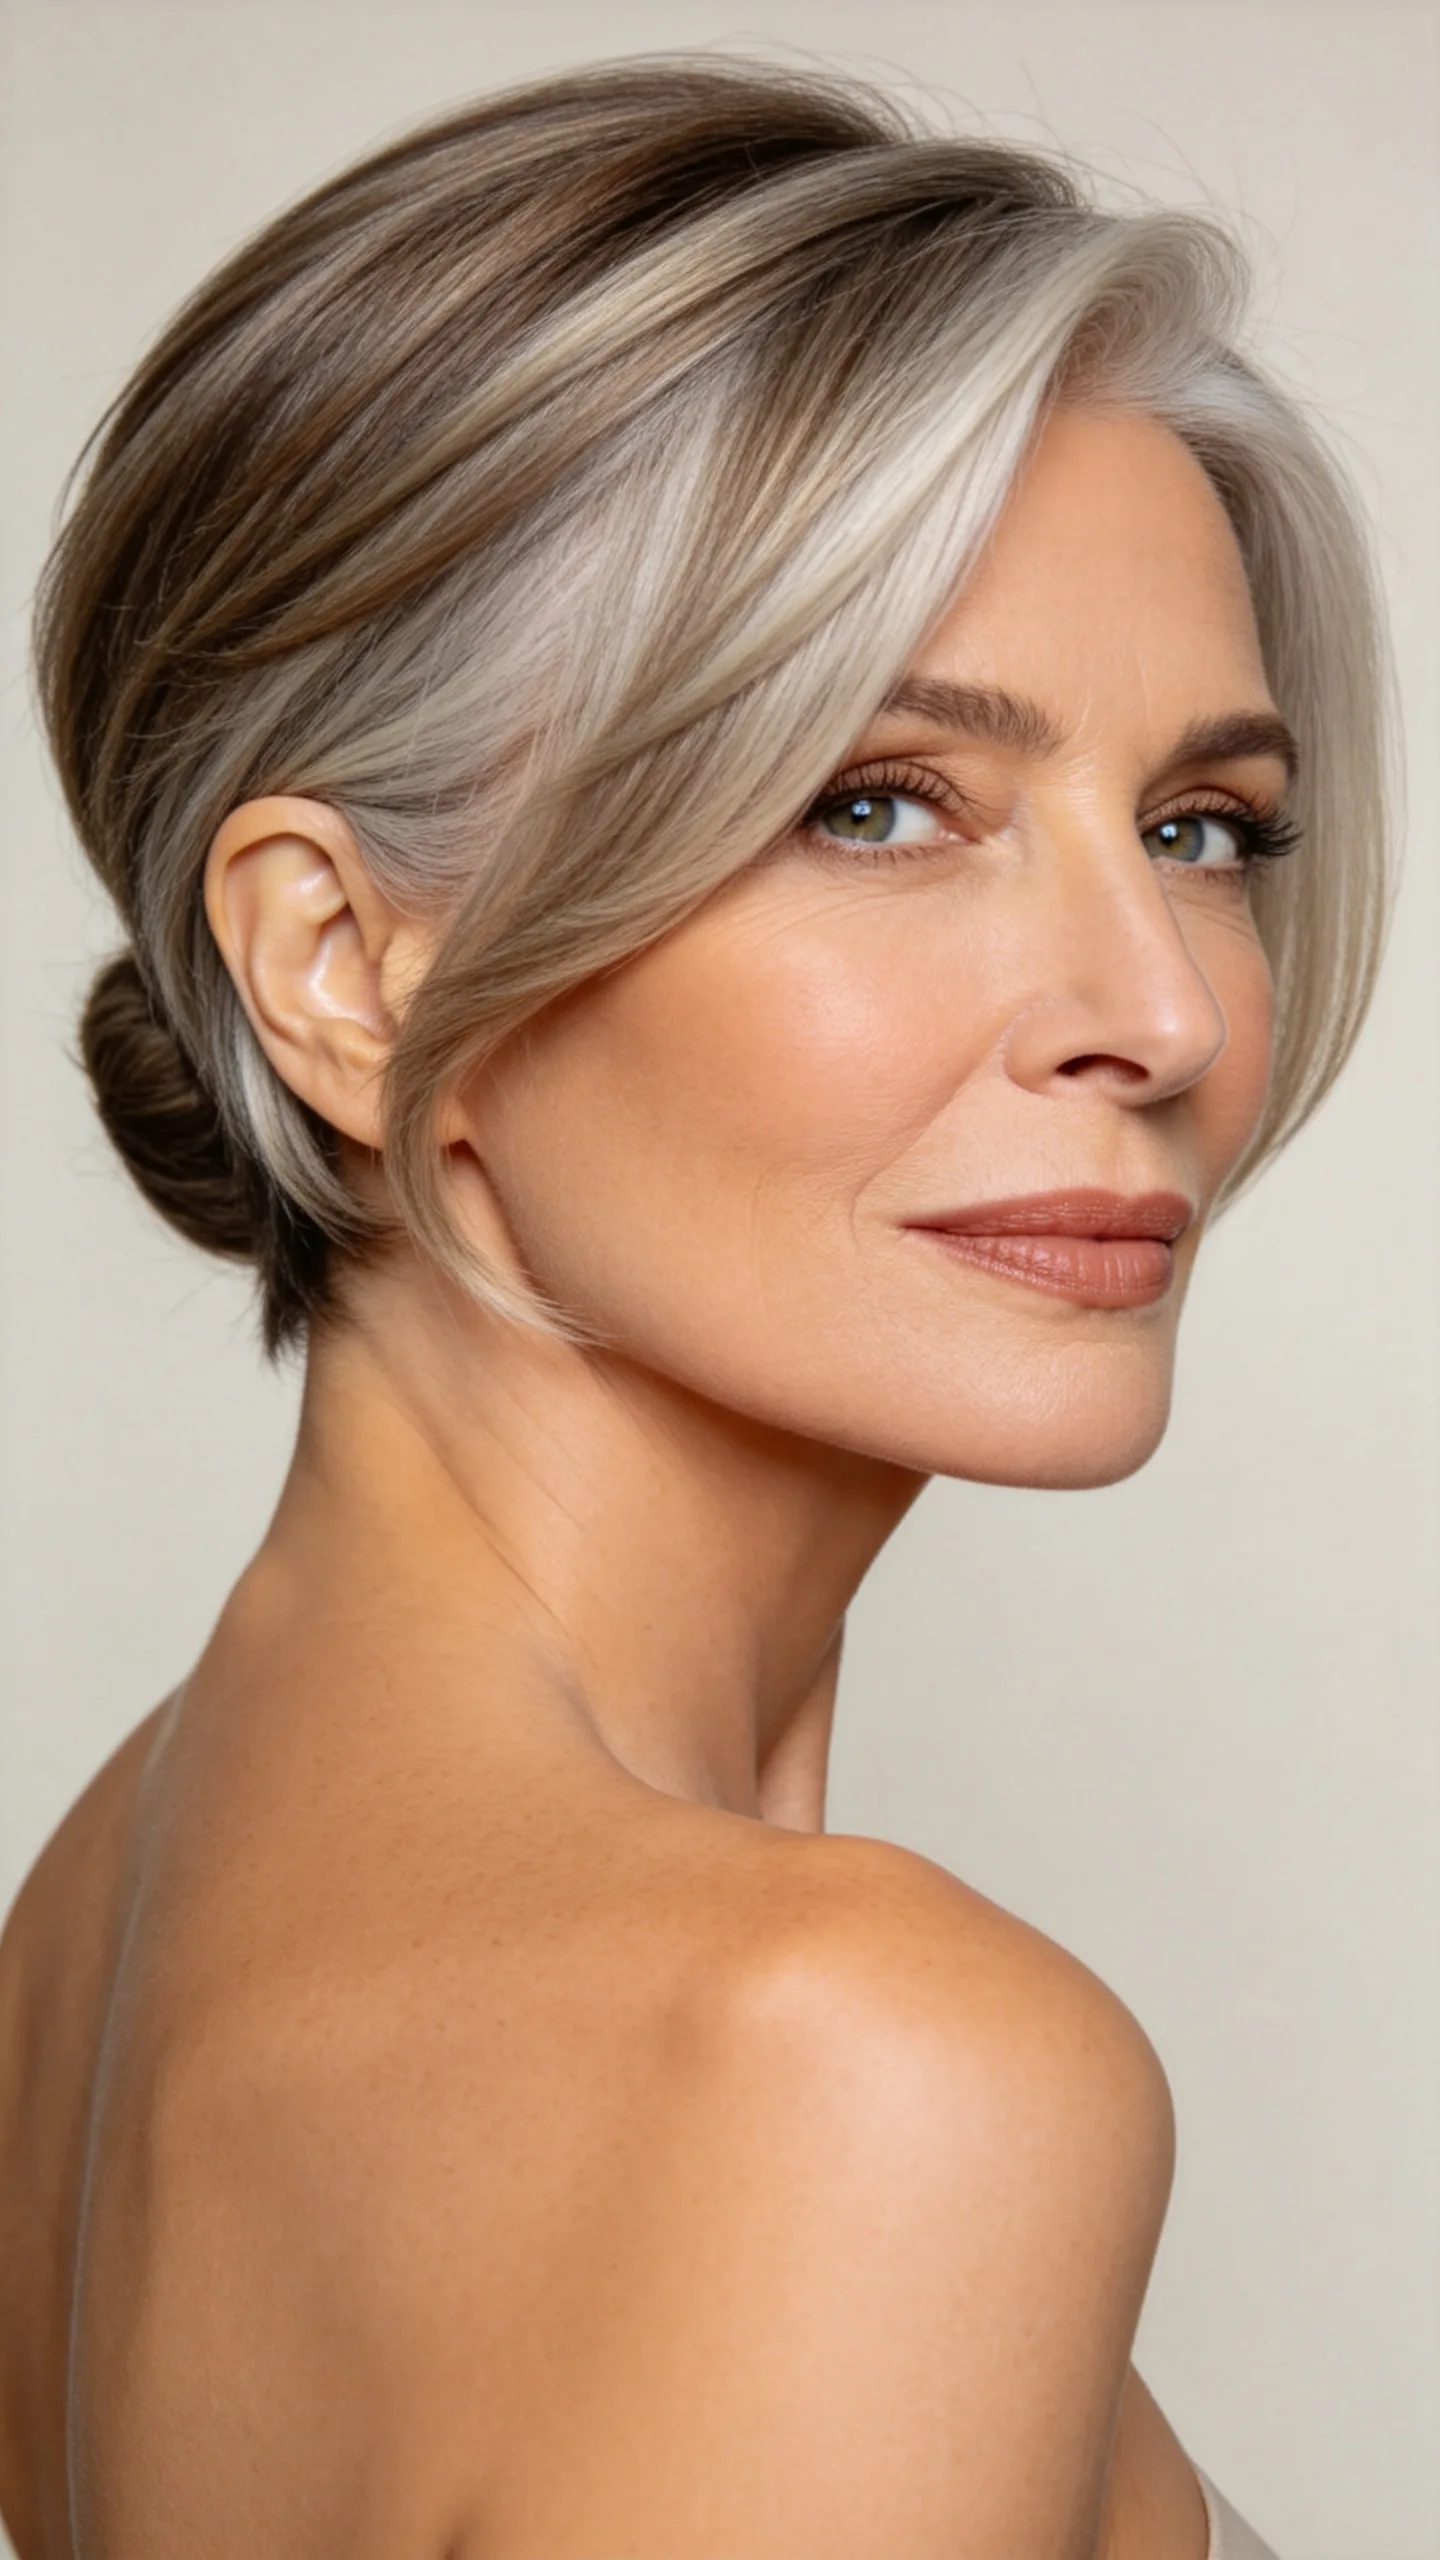
A pixie bob offers more coverage than a traditional cropped pixie, making it a useful option when transitioning from a bob to shorter hair. Stacked layers shape the back, while cheekbone-length front pieces frame the sides of the face.
The longer outline can be worn smooth with a tucked side or styled with loose bends for texture. A smoothing serum on the ends helps define the front layers, especially on thick, coarse, or naturally silver hair.
7. Choppy Pixie with Piecey Side Bangs
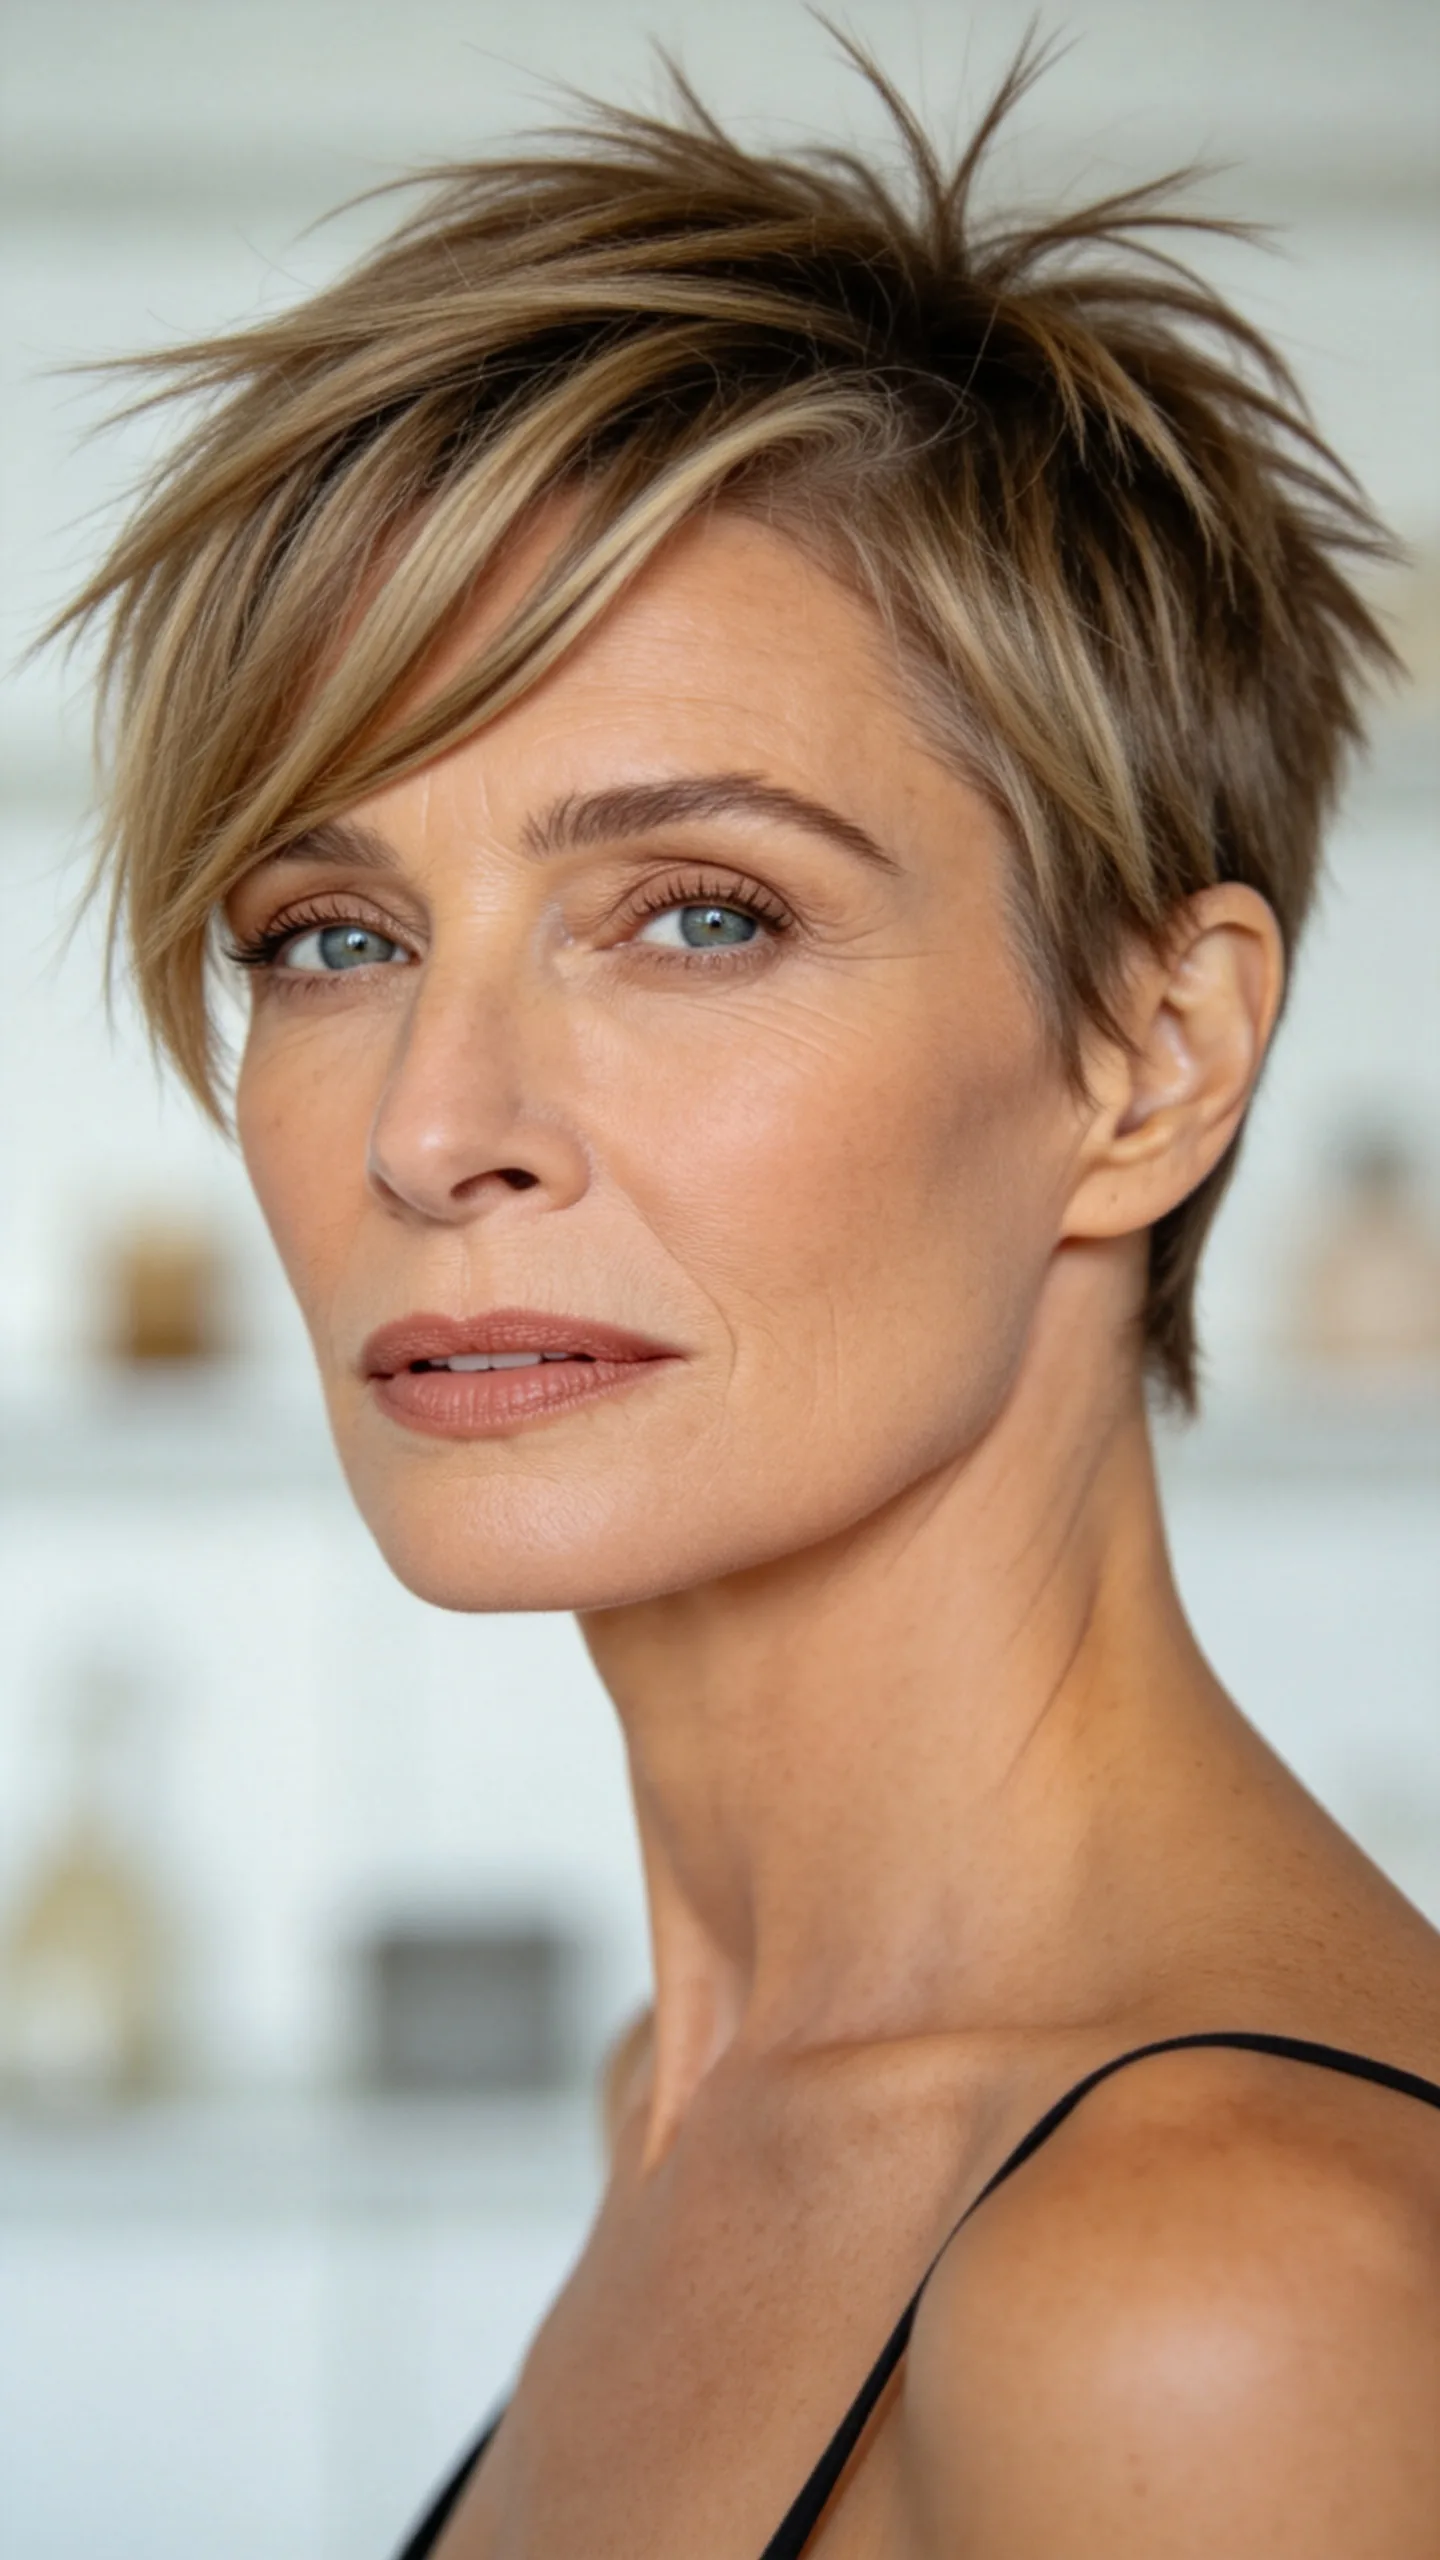
Short, uneven layers give this pixie a deliberately tousled finish. Piecey side bangs expose small sections of the forehead, creating a lighter look than a solid fringe while still providing face-framing detail.
Use dry texture spray at the roots and a small amount of wax on the ends. Alternate the direction of a few top layers with your fingers so the cut appears dimensional rather than uniformly spiked.
8. Softly Rounded Pixie with Curved Fringe
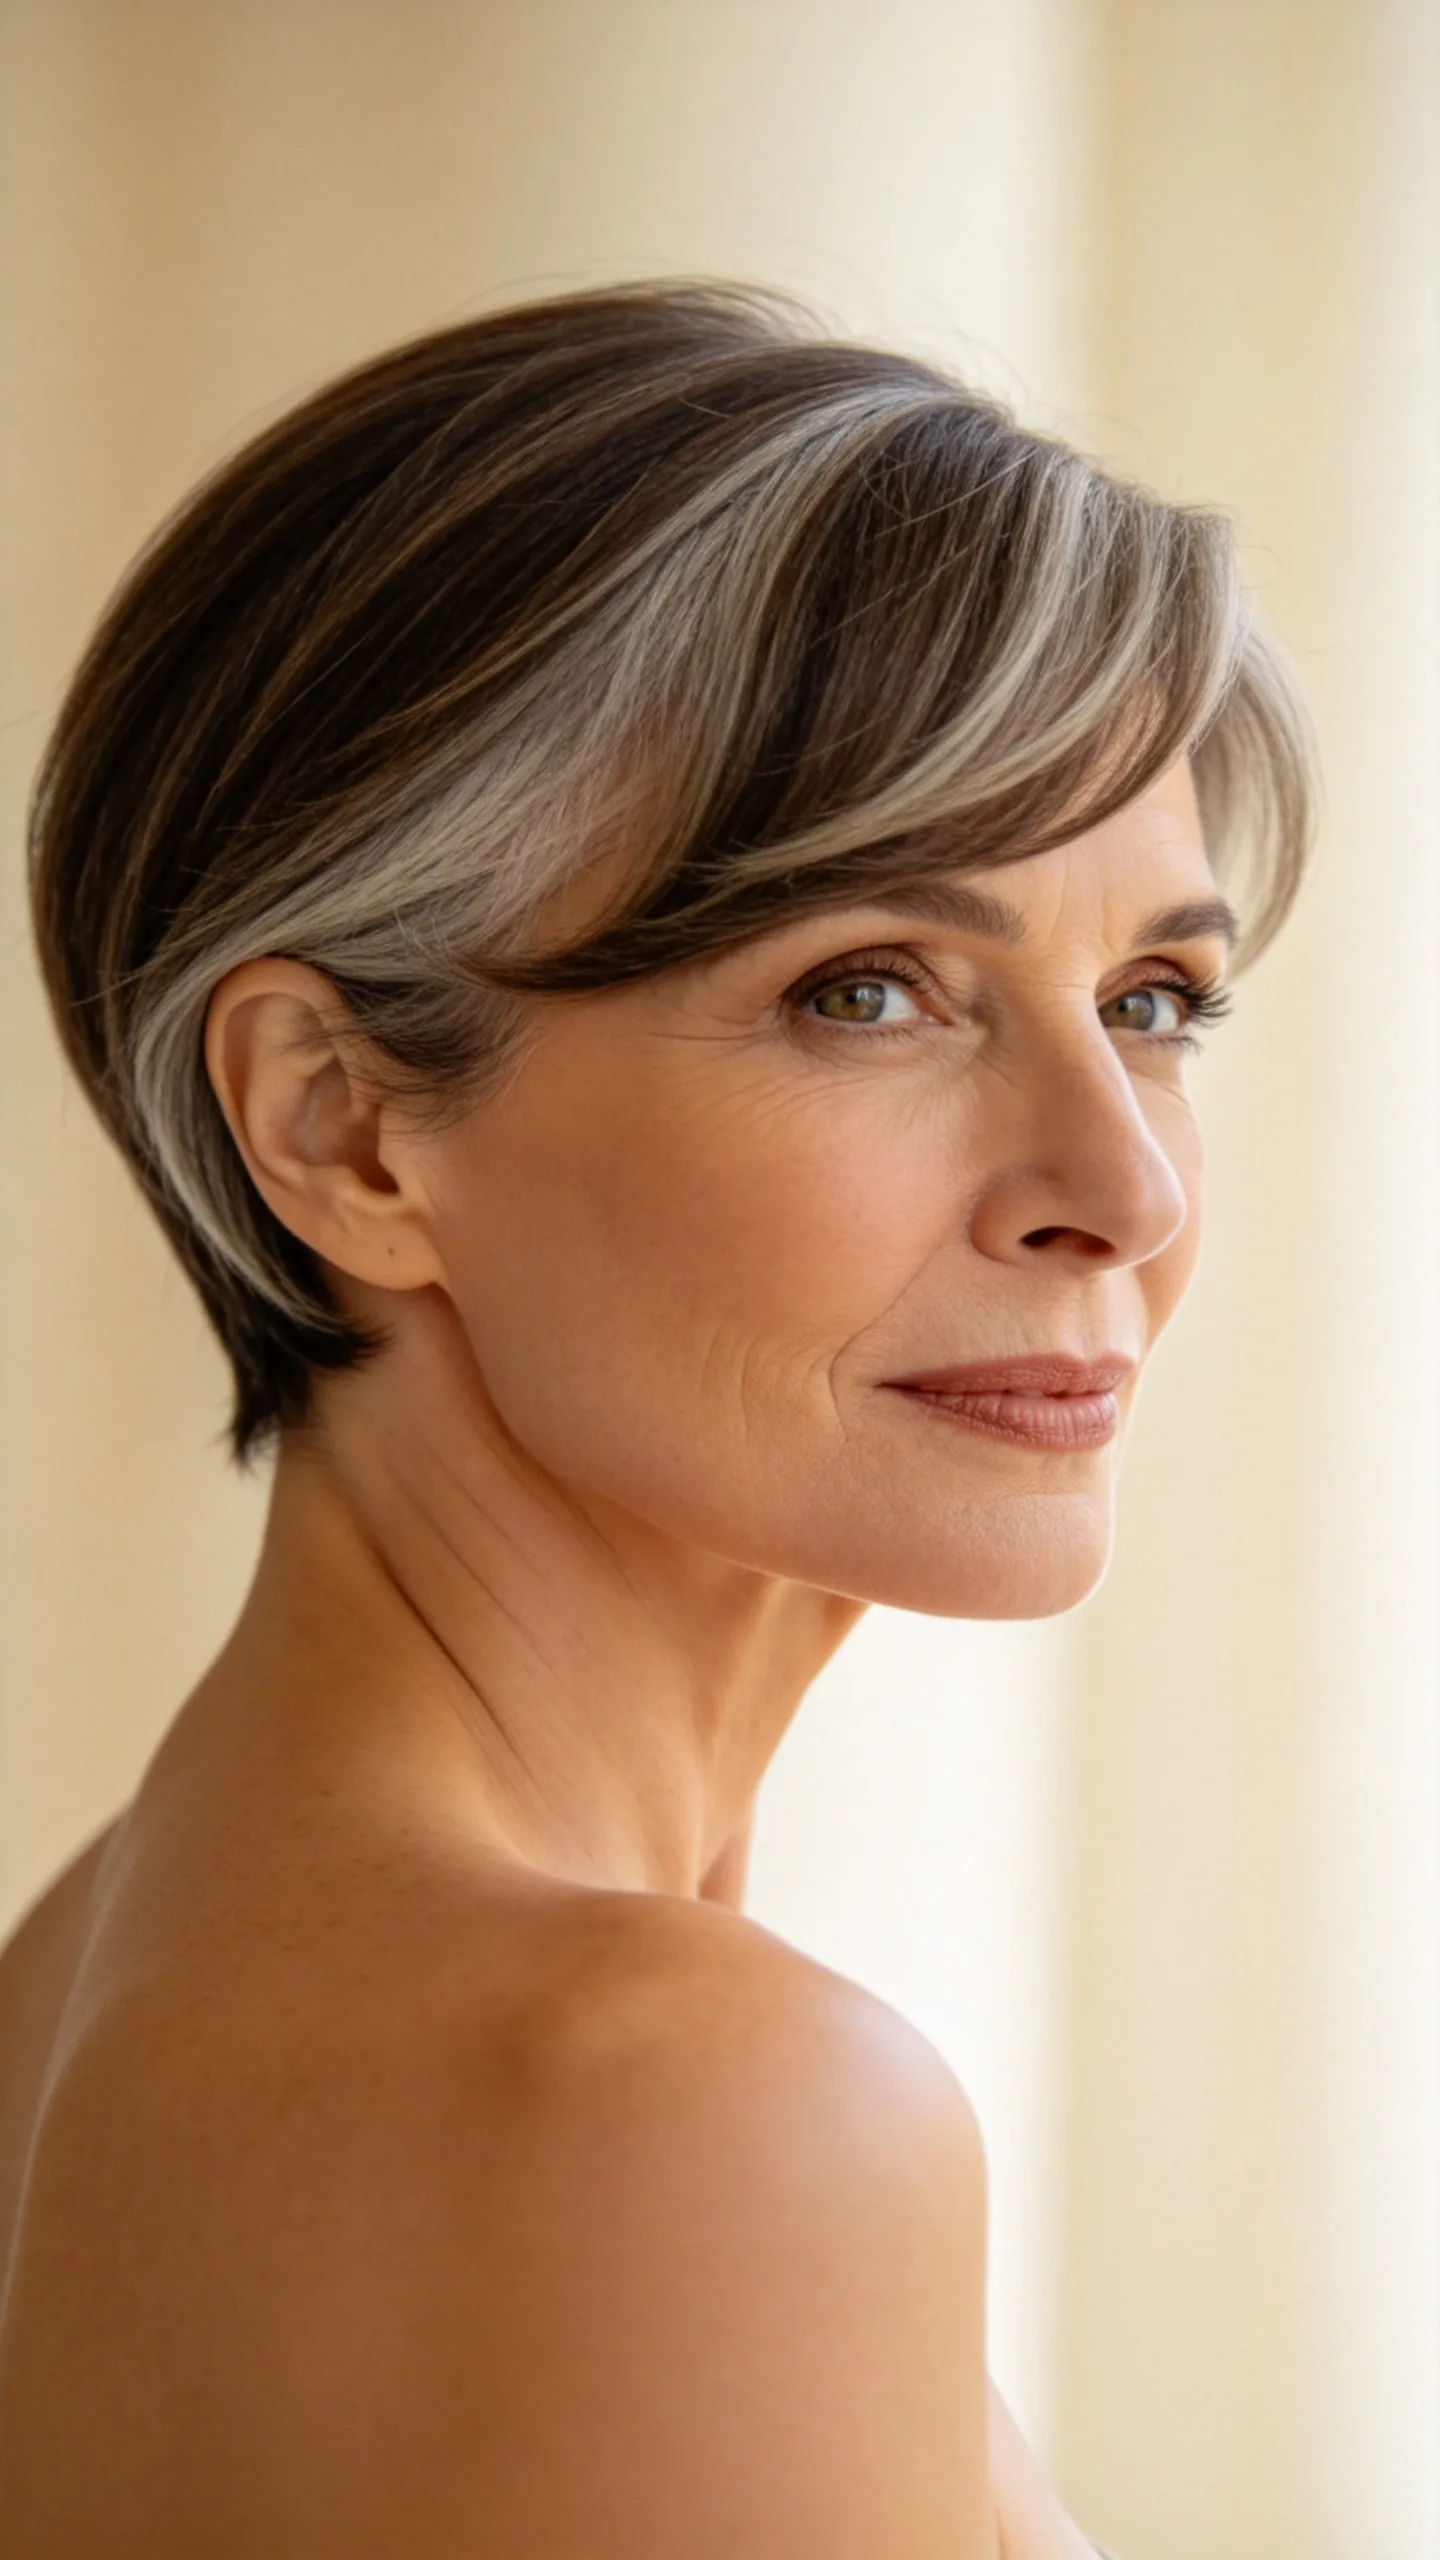
A rounded pixie follows the natural contour of the head and includes a gently curved fringe that blends into the sides. The smooth outline works well for anyone who prefers controlled volume over a heavily tousled finish.
Request subtle internal layers to stop the shape from becoming helmet-like. Blow-dry the fringe forward with a small round brush, then sweep the ends slightly to the side to open the eye area.
9. Asymmetrical Pixie with a Long Front Layer
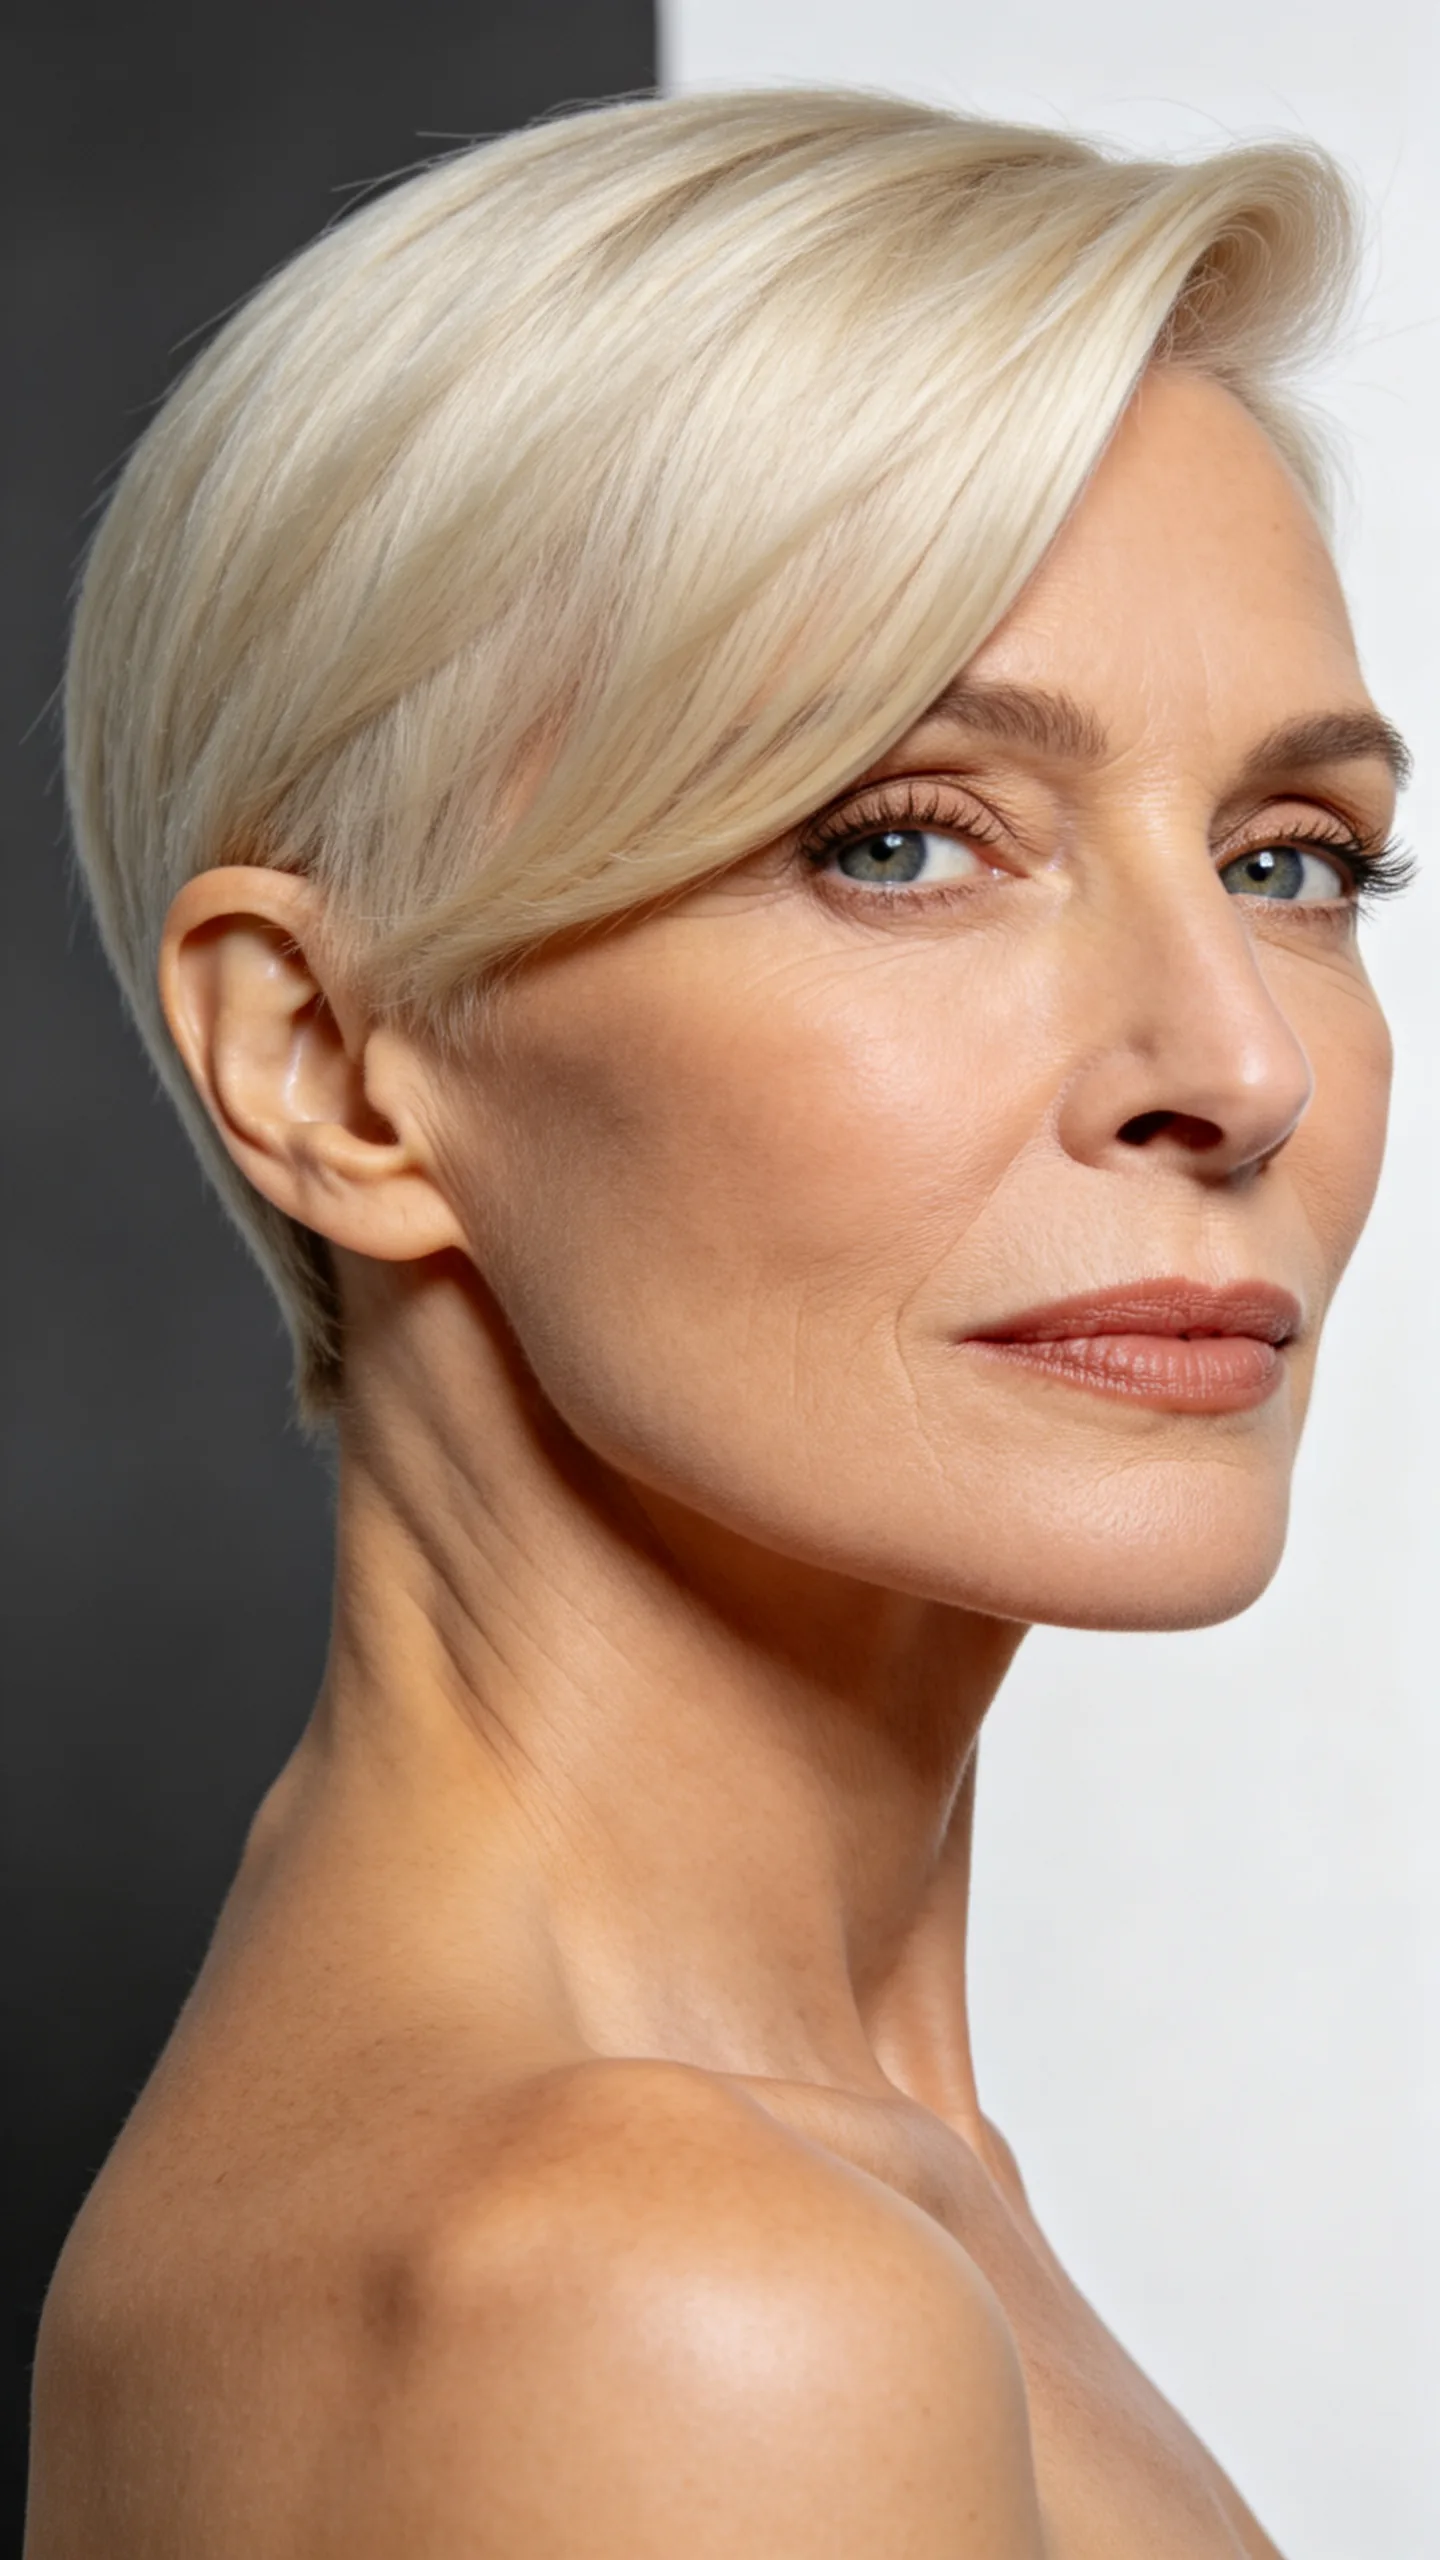
An asymmetrical pixie features one short side and a longer front section that falls diagonally across the forehead. This uneven balance creates a strong focal point while allowing the longer layer to skim the eyebrow or cheekbone.
Keep the longer side smooth with a flat brush and a heat protectant, or add a slight bend for a softer finish. Regular trims around the ear and nape will preserve the contrast between the cropped and elongated sections.
10. Wavy Pixie with Airy Crown Layers
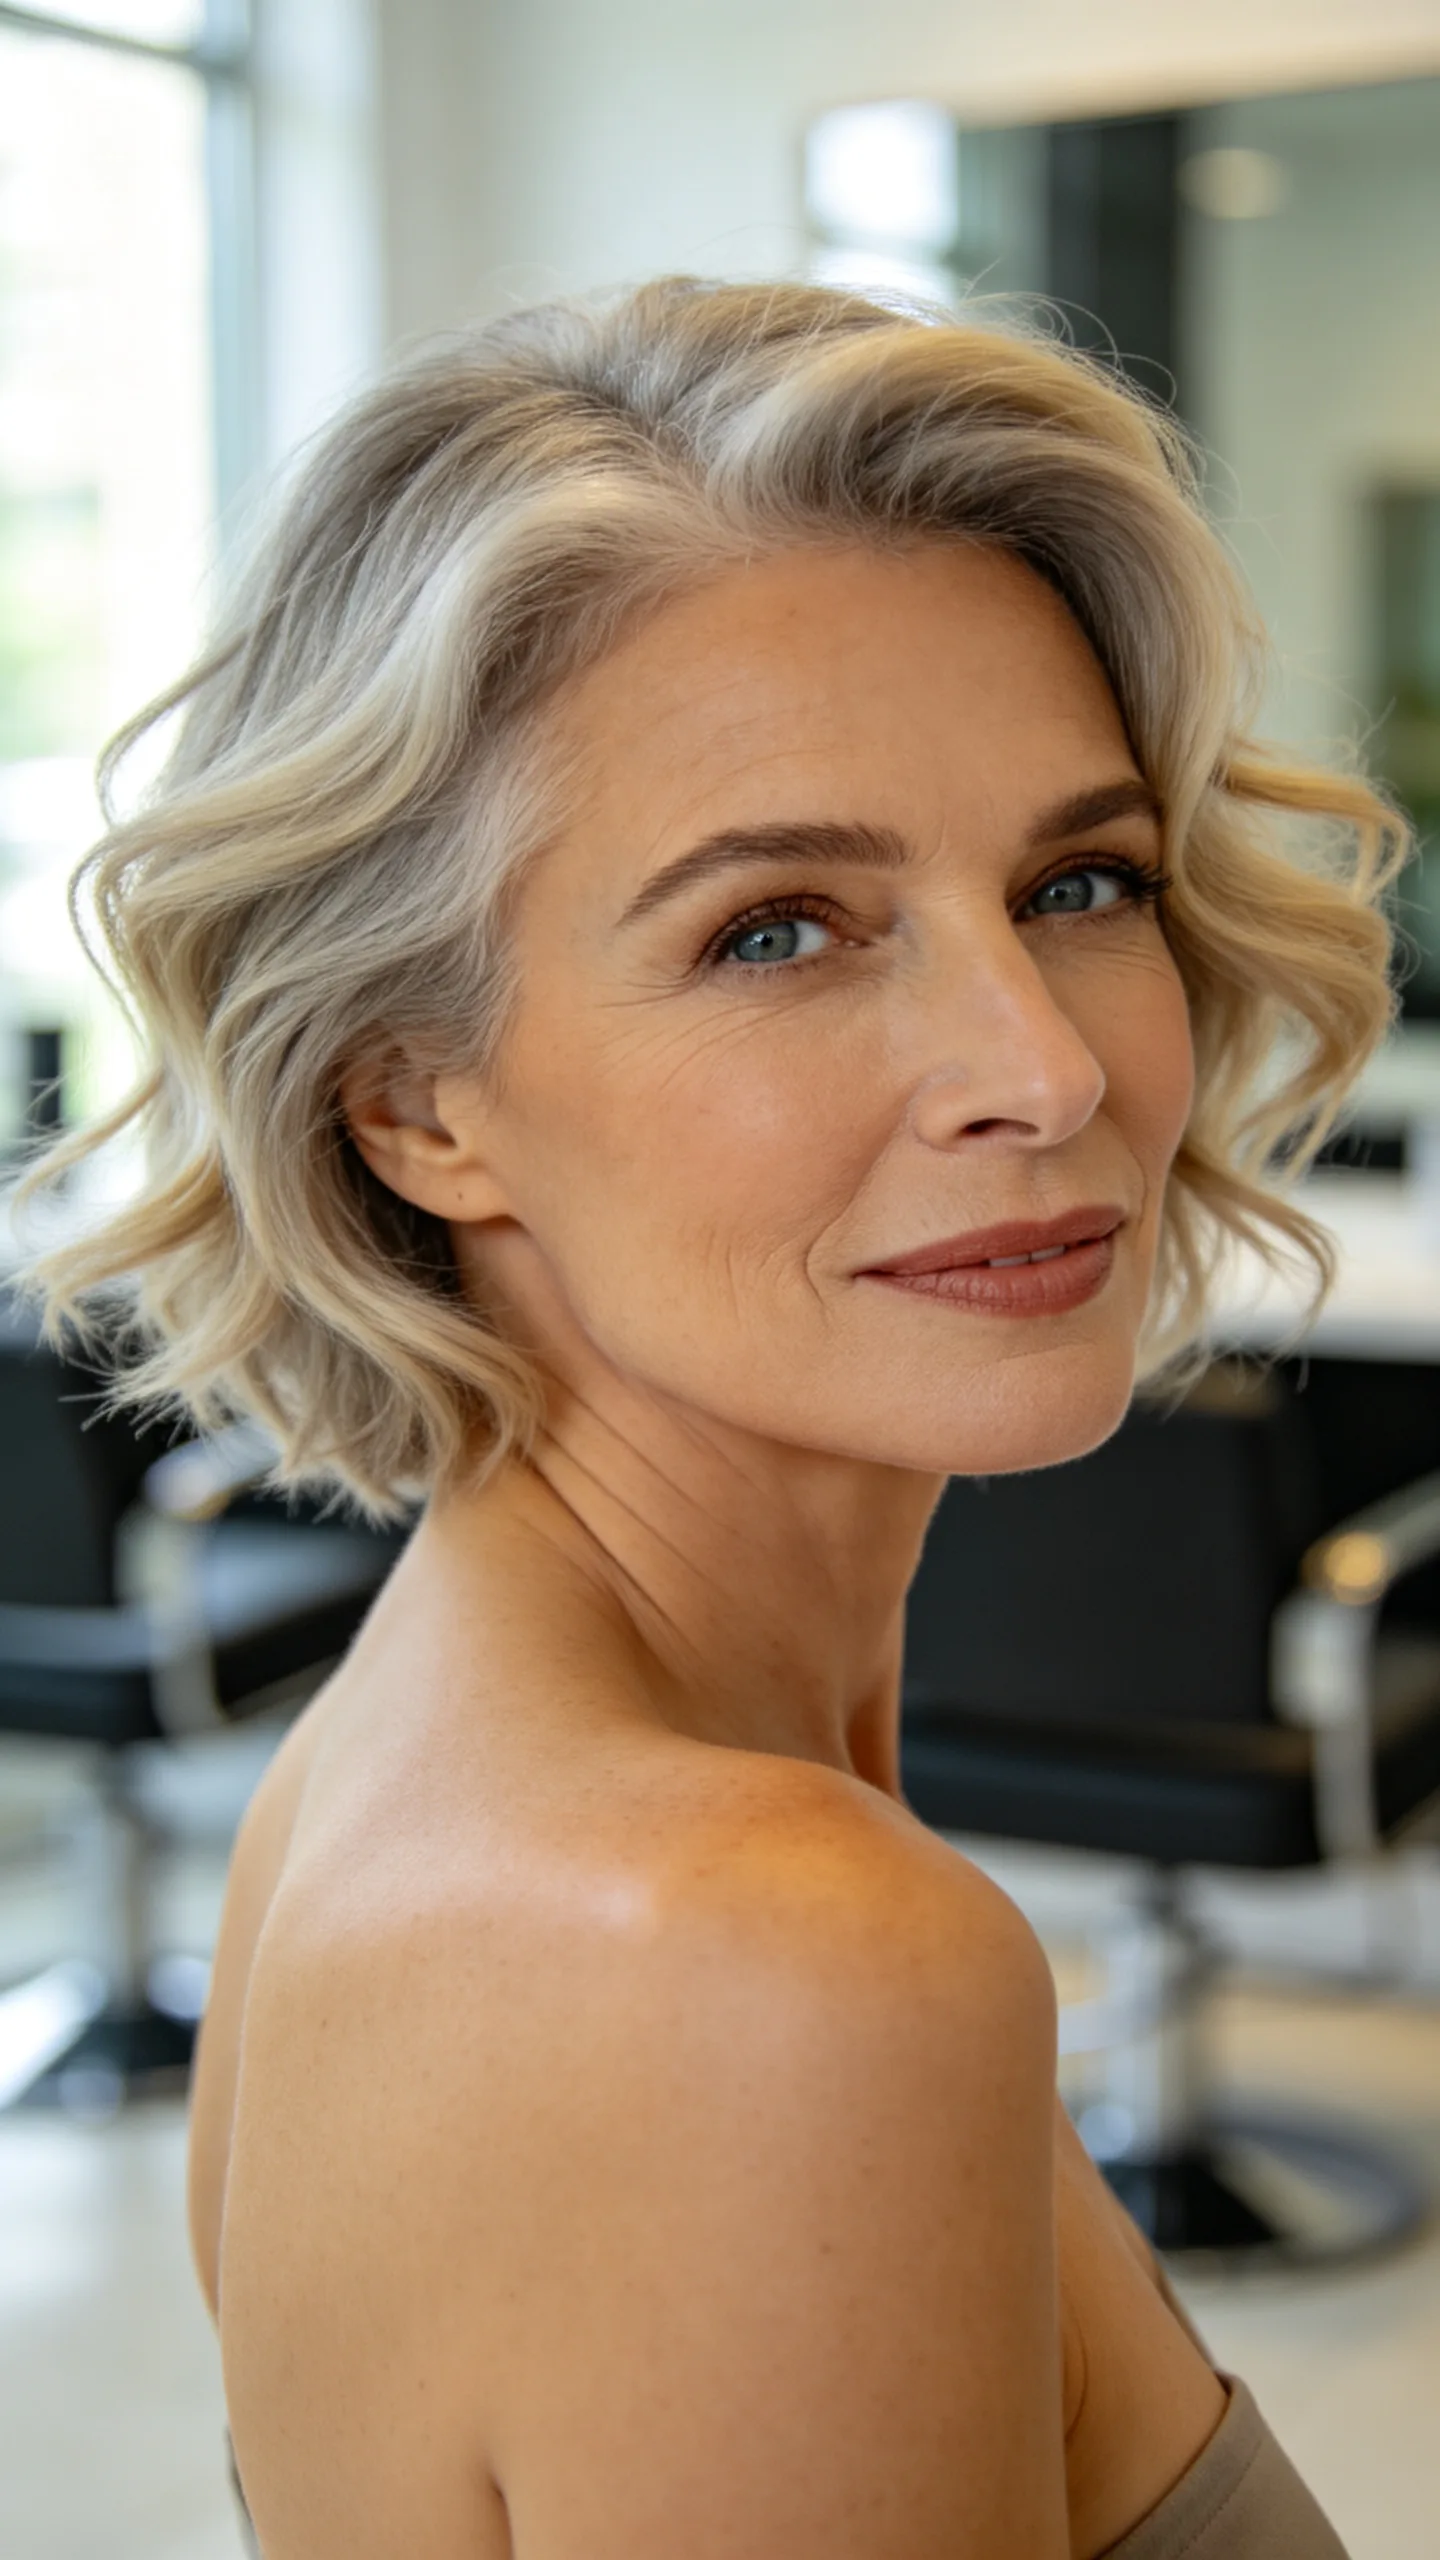
Soft waves give a short pixie natural lift without requiring a rigid, sculpted shape. Airy crown layers reduce weight and connect to shorter pieces around the temples, keeping the movement balanced from top to sides.
Apply volumizing foam at the roots and twist a few damp sections around your fingers. Once the hair is dry, loosen the waves rather than brushing them out, then mist with flexible-hold hairspray.
11. Classic Pixie with Eyebrow-Skimming Bangs
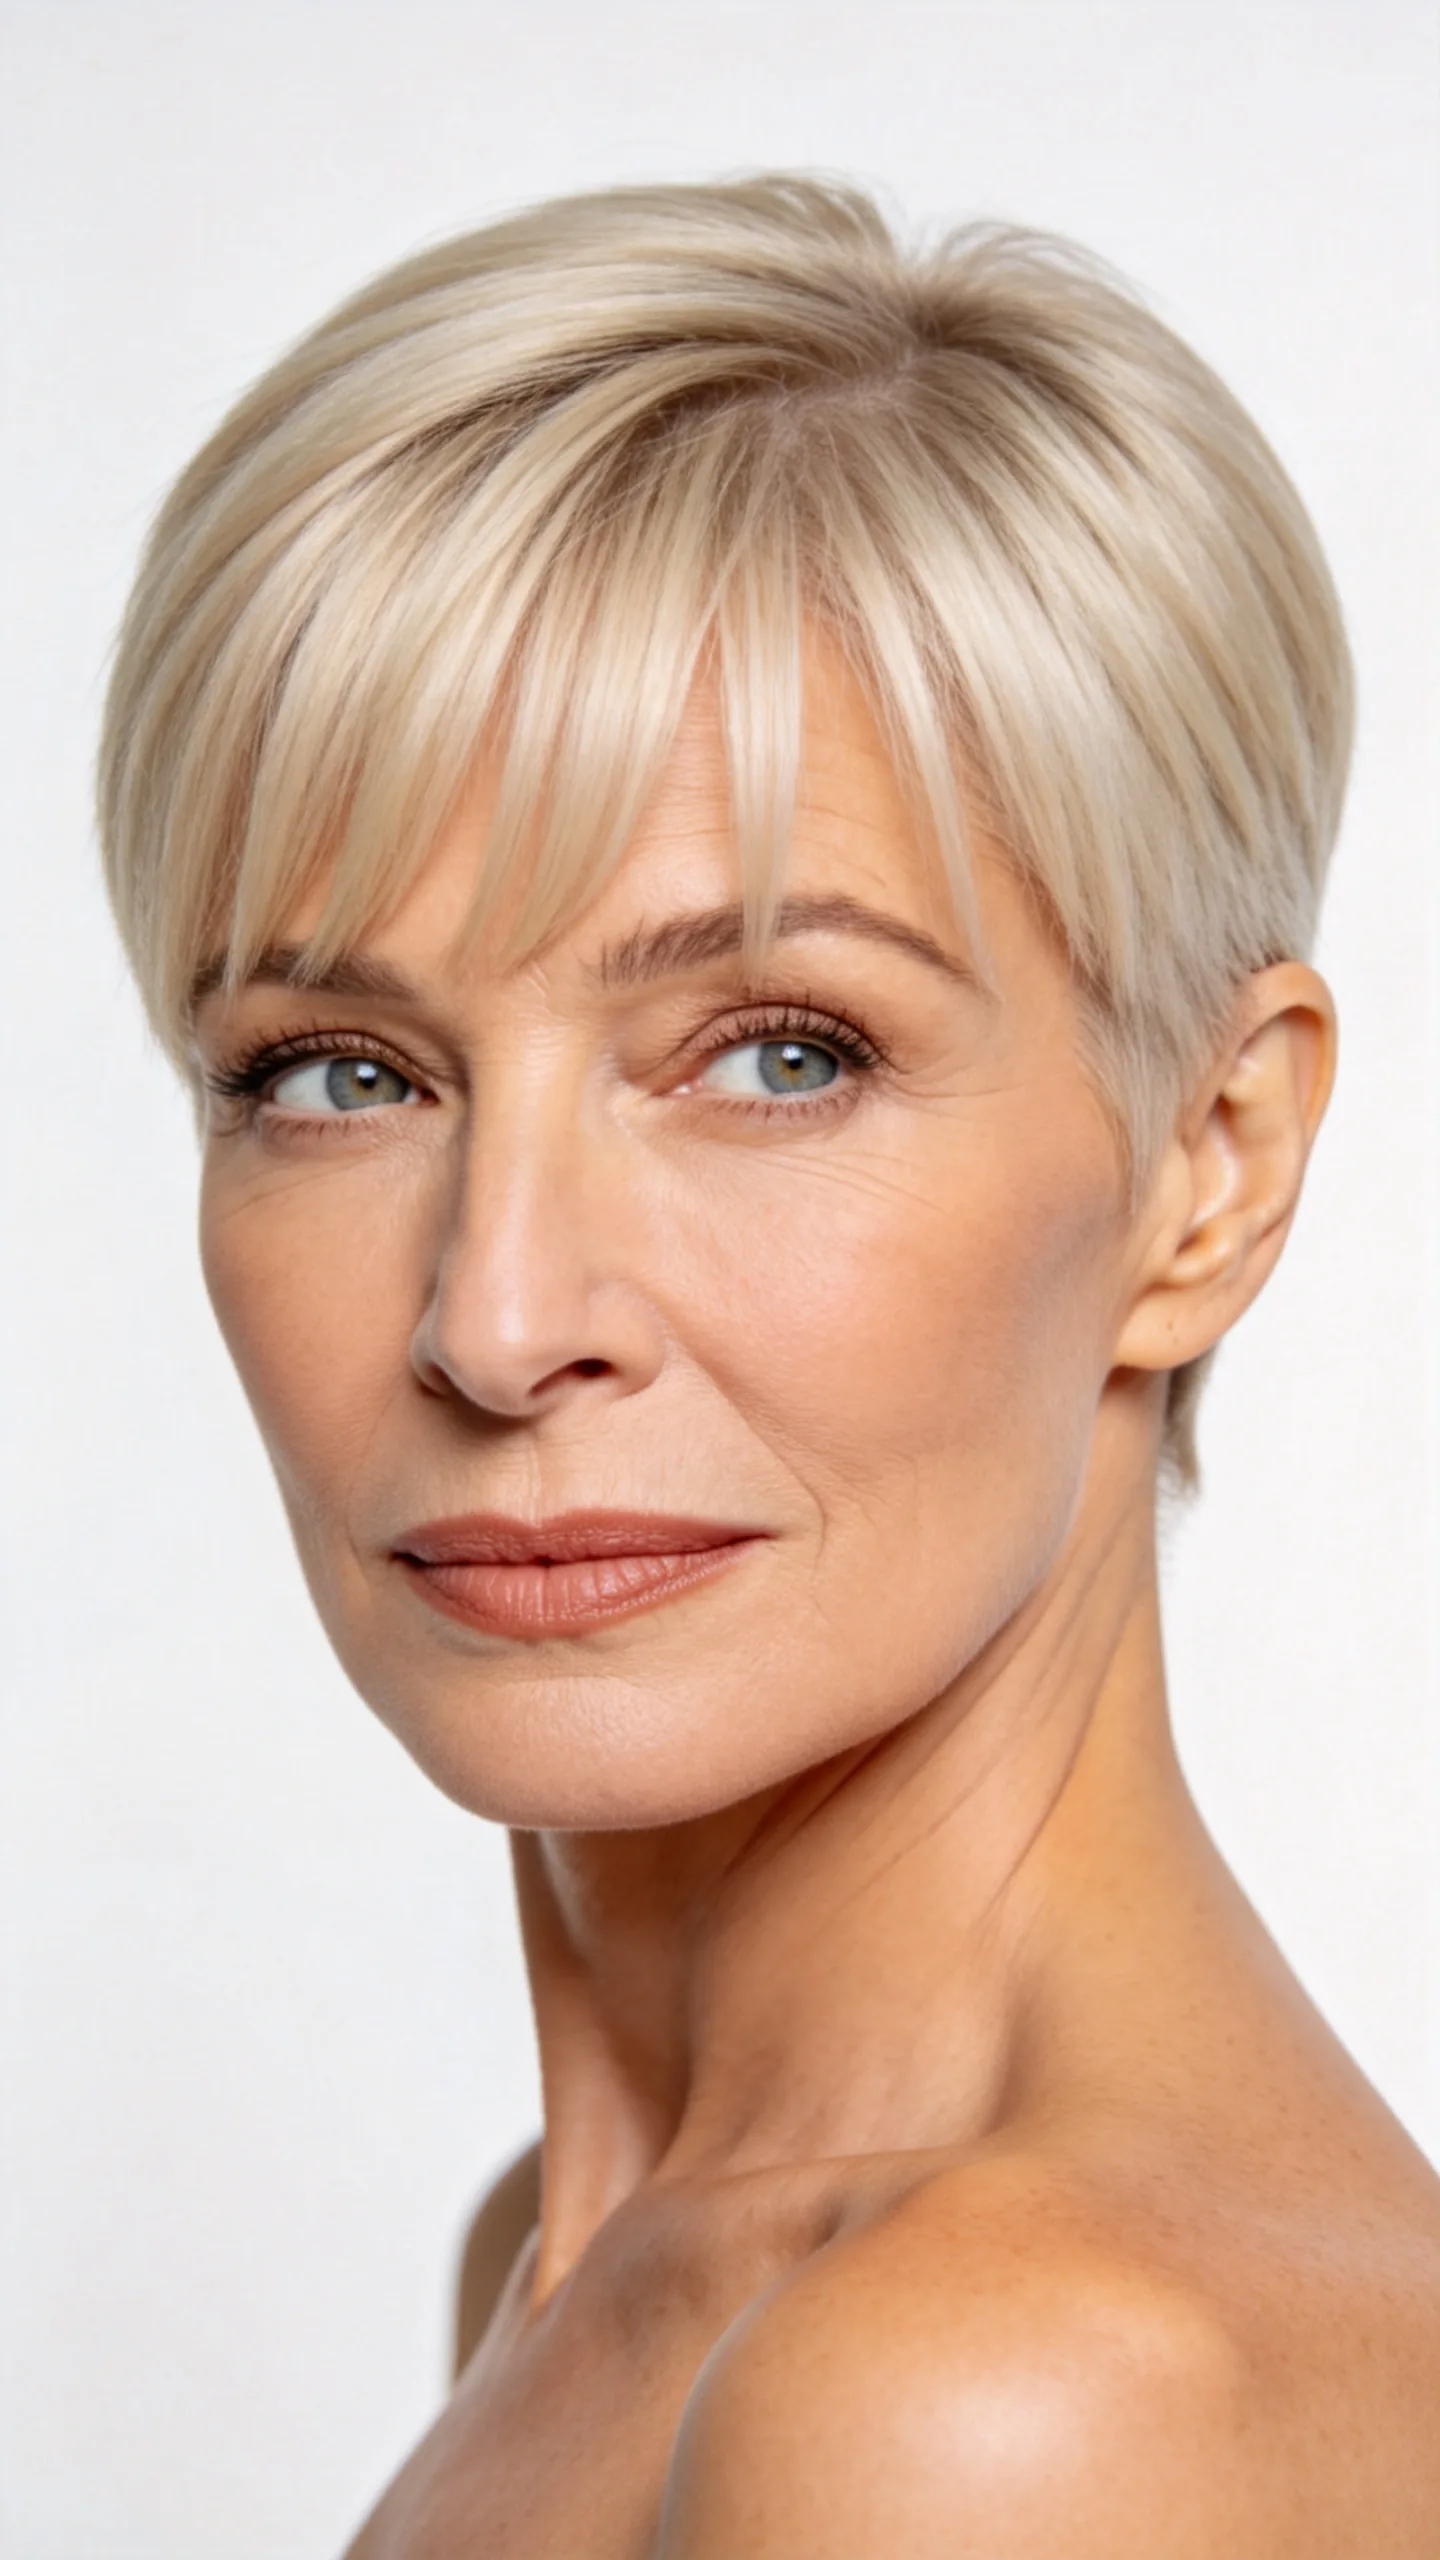
This classic pixie uses short sides, a neat nape, and slightly longer bangs that skim the eyebrows. Light point-cutting along the fringe creates spaces between the strands, preventing the bangs from looking dense or severe.
The cut suits straight hair and can also help fine hair appear more structured. Dry the bangs from side to side first to prevent them from splitting, then position them forward with a slight sweep at the ends.
12. Spiky Pixie with Soft Side Layers
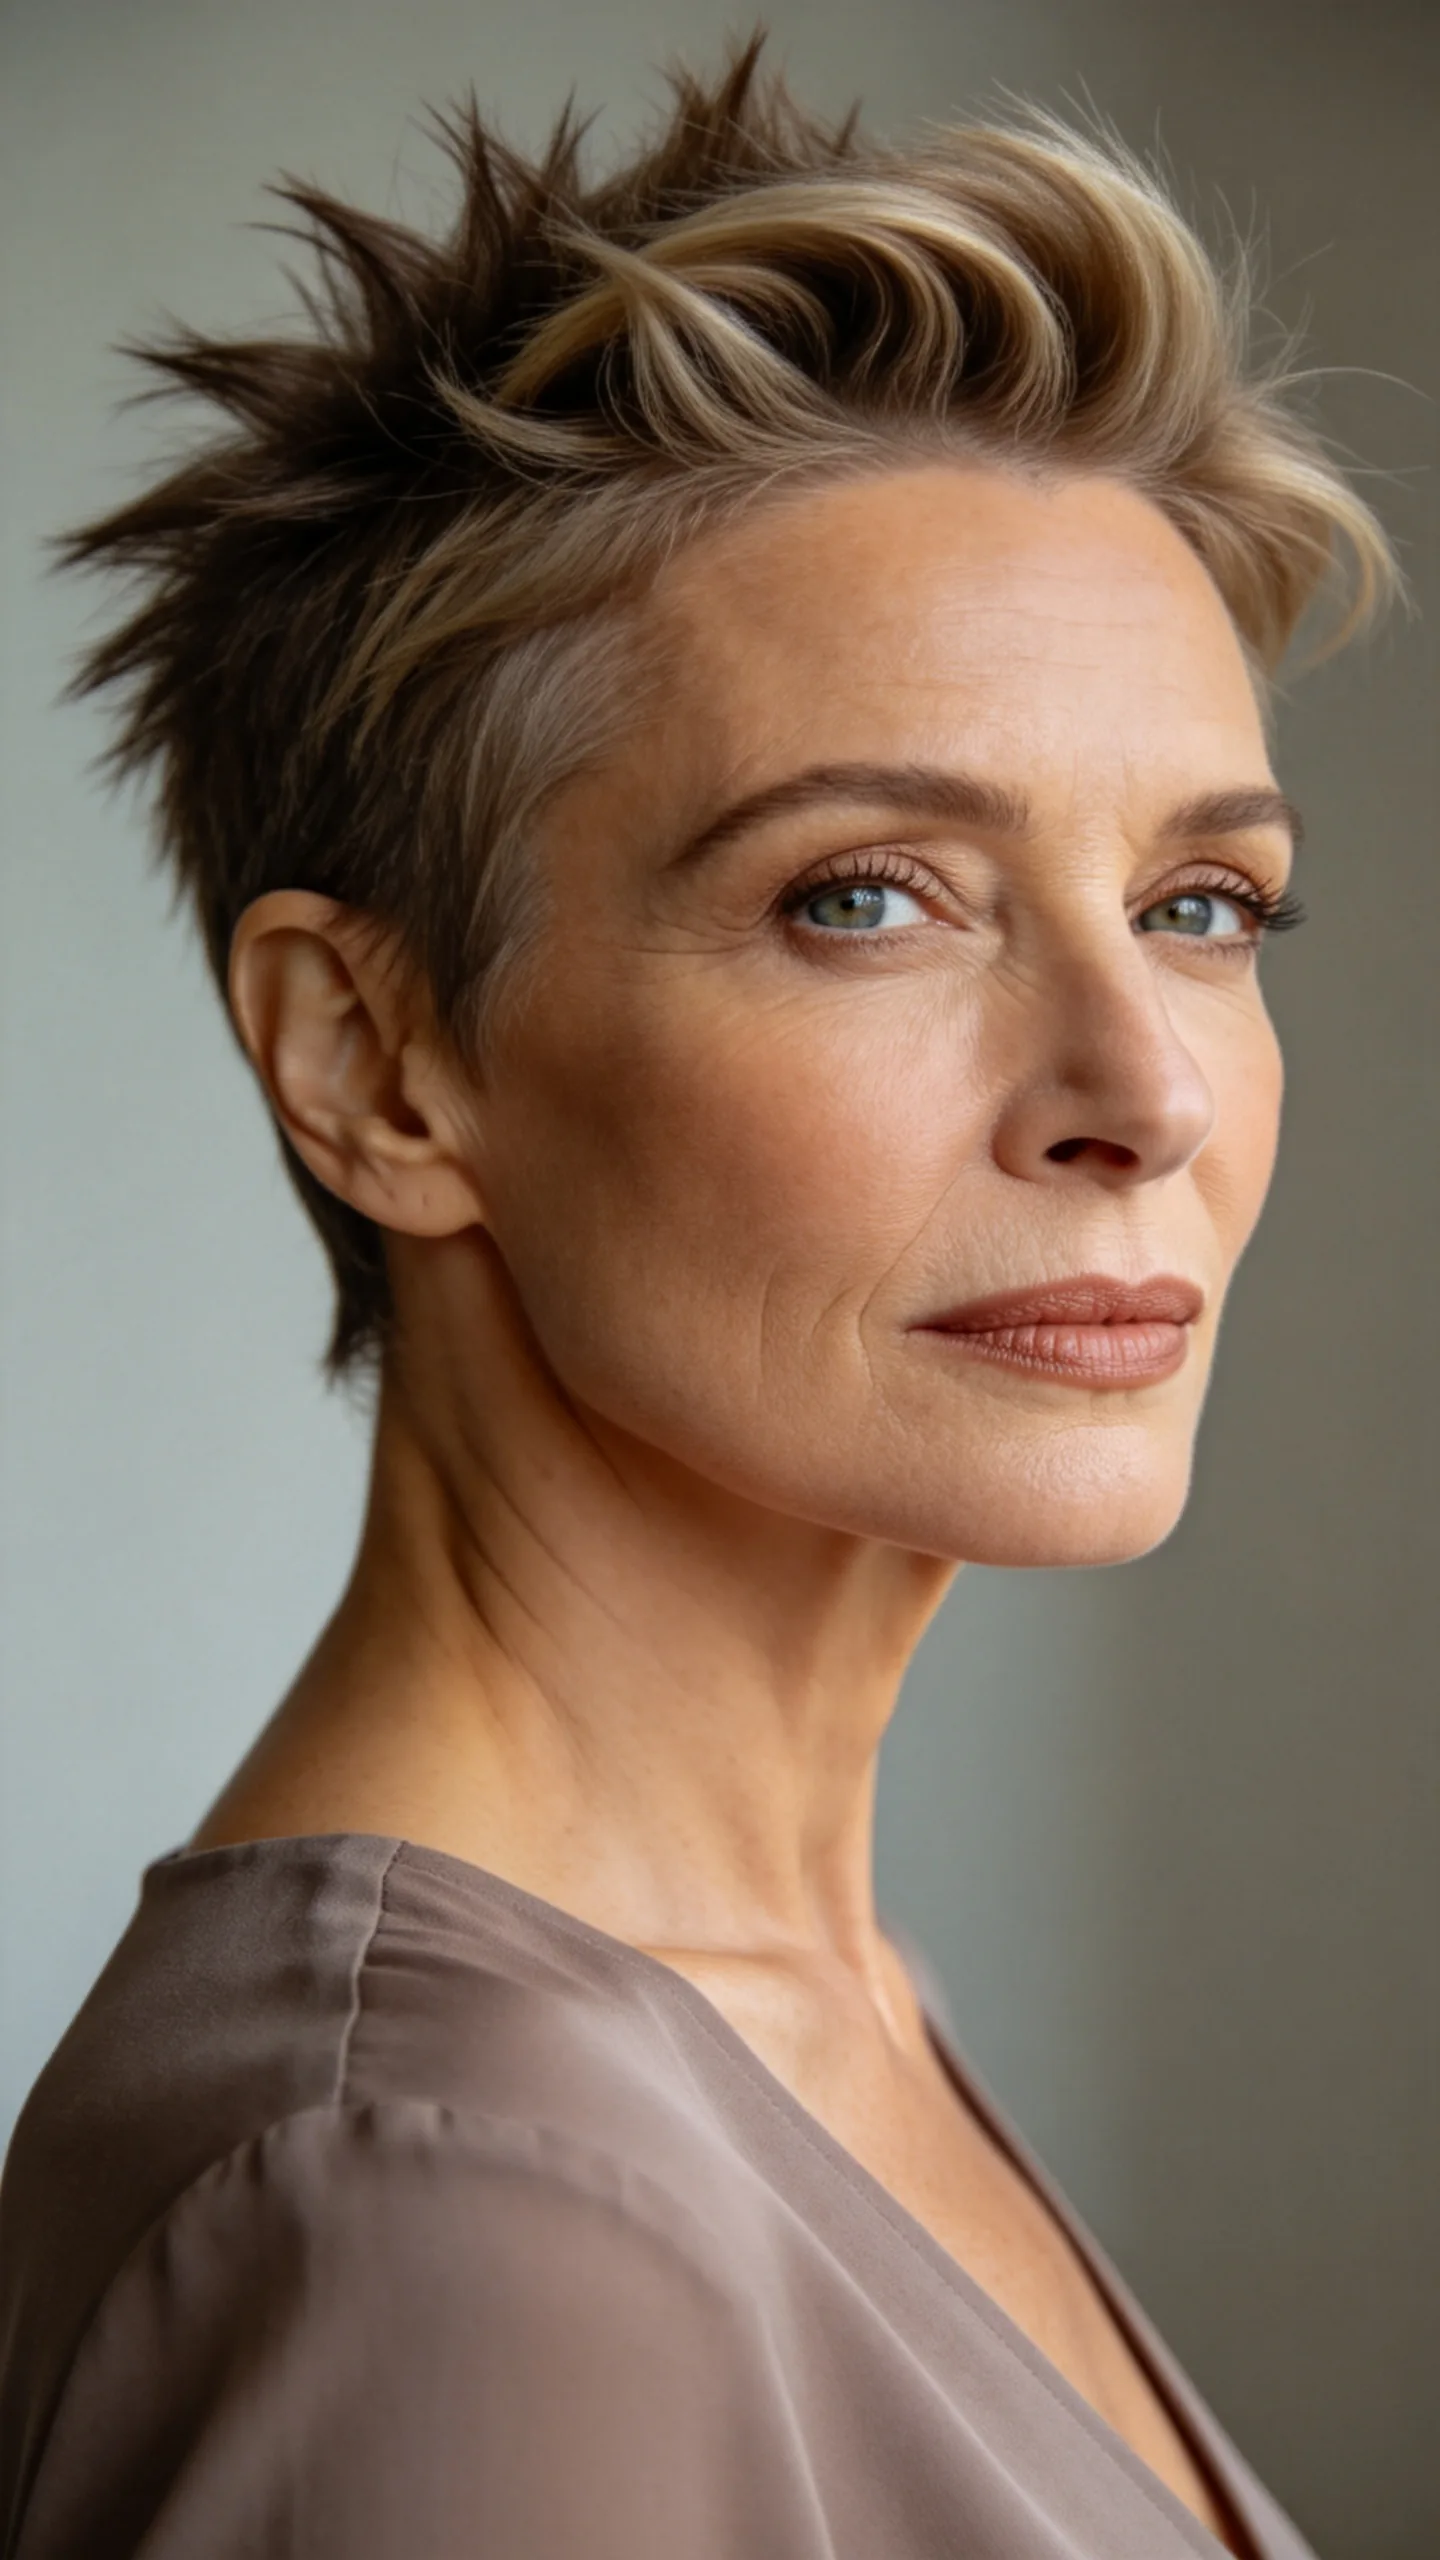
A spiky pixie adds height through the crown while retaining softer layers beside the forehead and ears. The combination creates definition on top without making the entire haircut look sharp or rigid.
Rub a small amount of matte pomade between your fingertips before lifting selected crown pieces. Keep the side layers smooth and angled toward the cheekbones so the face-framing shape remains visible.
13. Undercut Pixie with a Sweeping Top
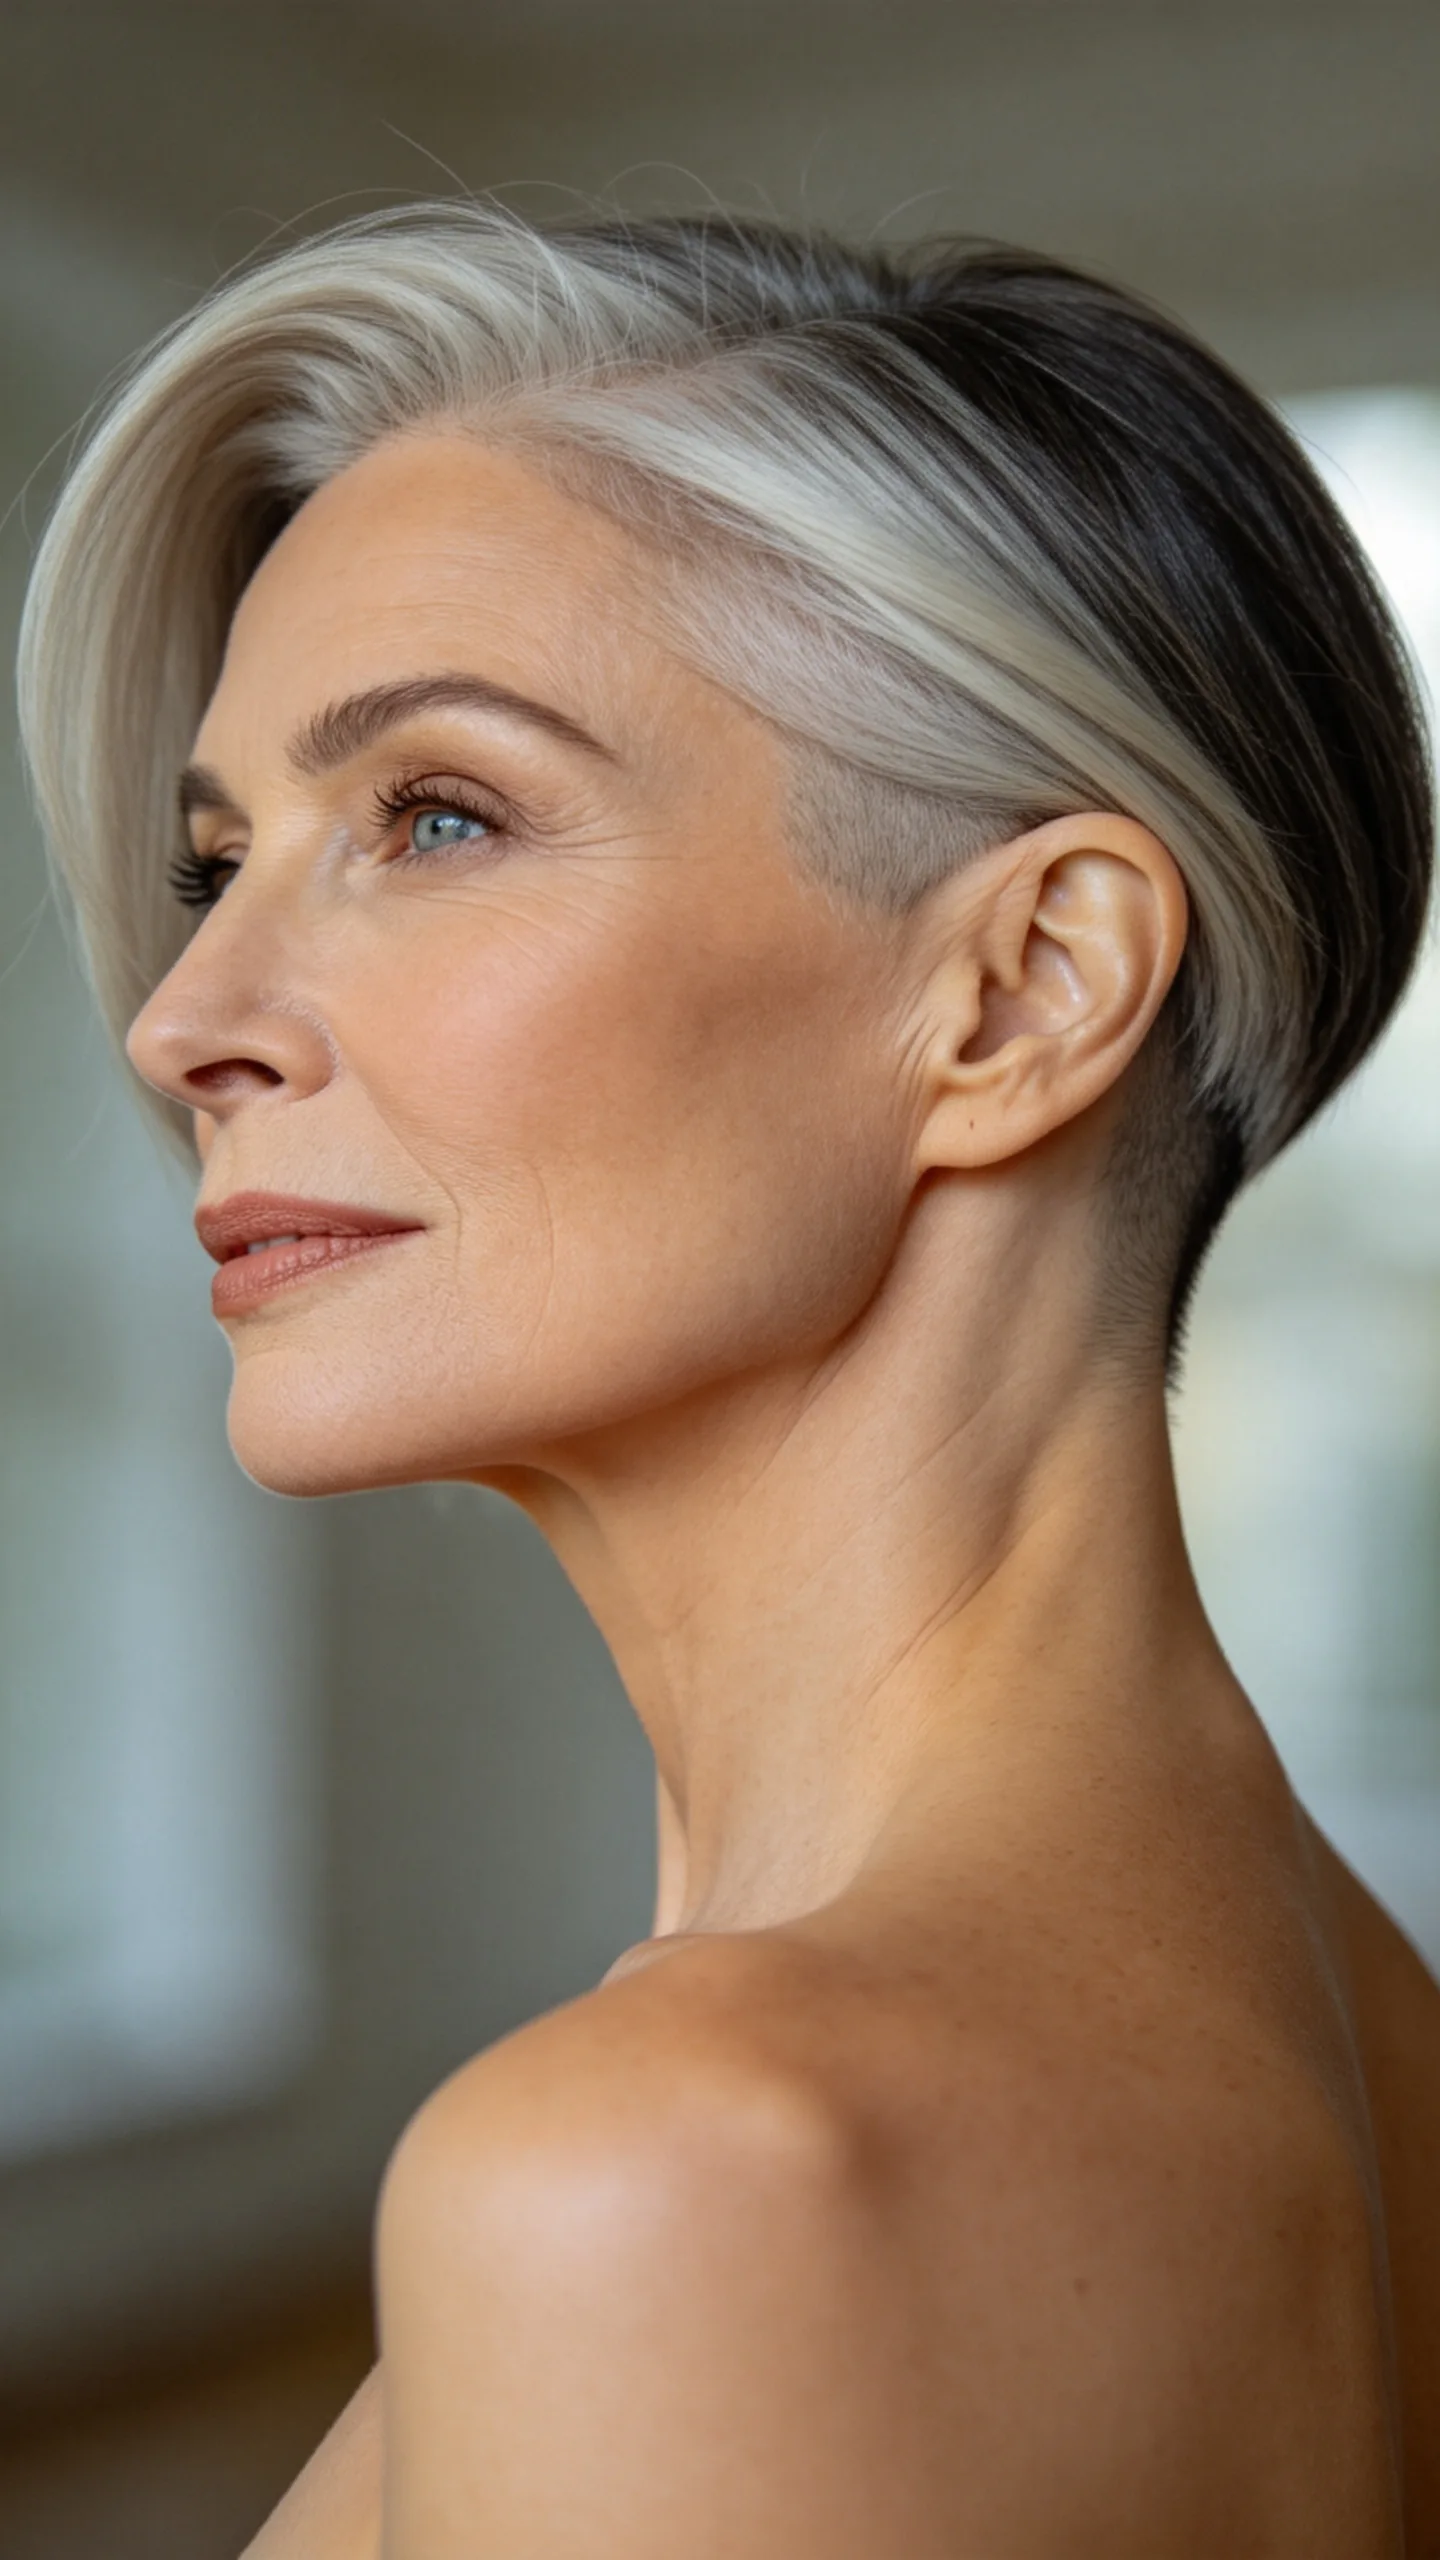
An undercut pixie removes bulk around the sides and nape while preserving a longer, layered top. Swept toward one side, the upper section provides coverage across the forehead and a smooth frame near the temple.
This option can be especially practical for dense hair that tends to widen at the sides. Ask for a softly blended undercut rather than a dramatic disconnected line if you want easier grow-out between appointments.
14. Fine-Hair Pixie with Graduated Front Layers
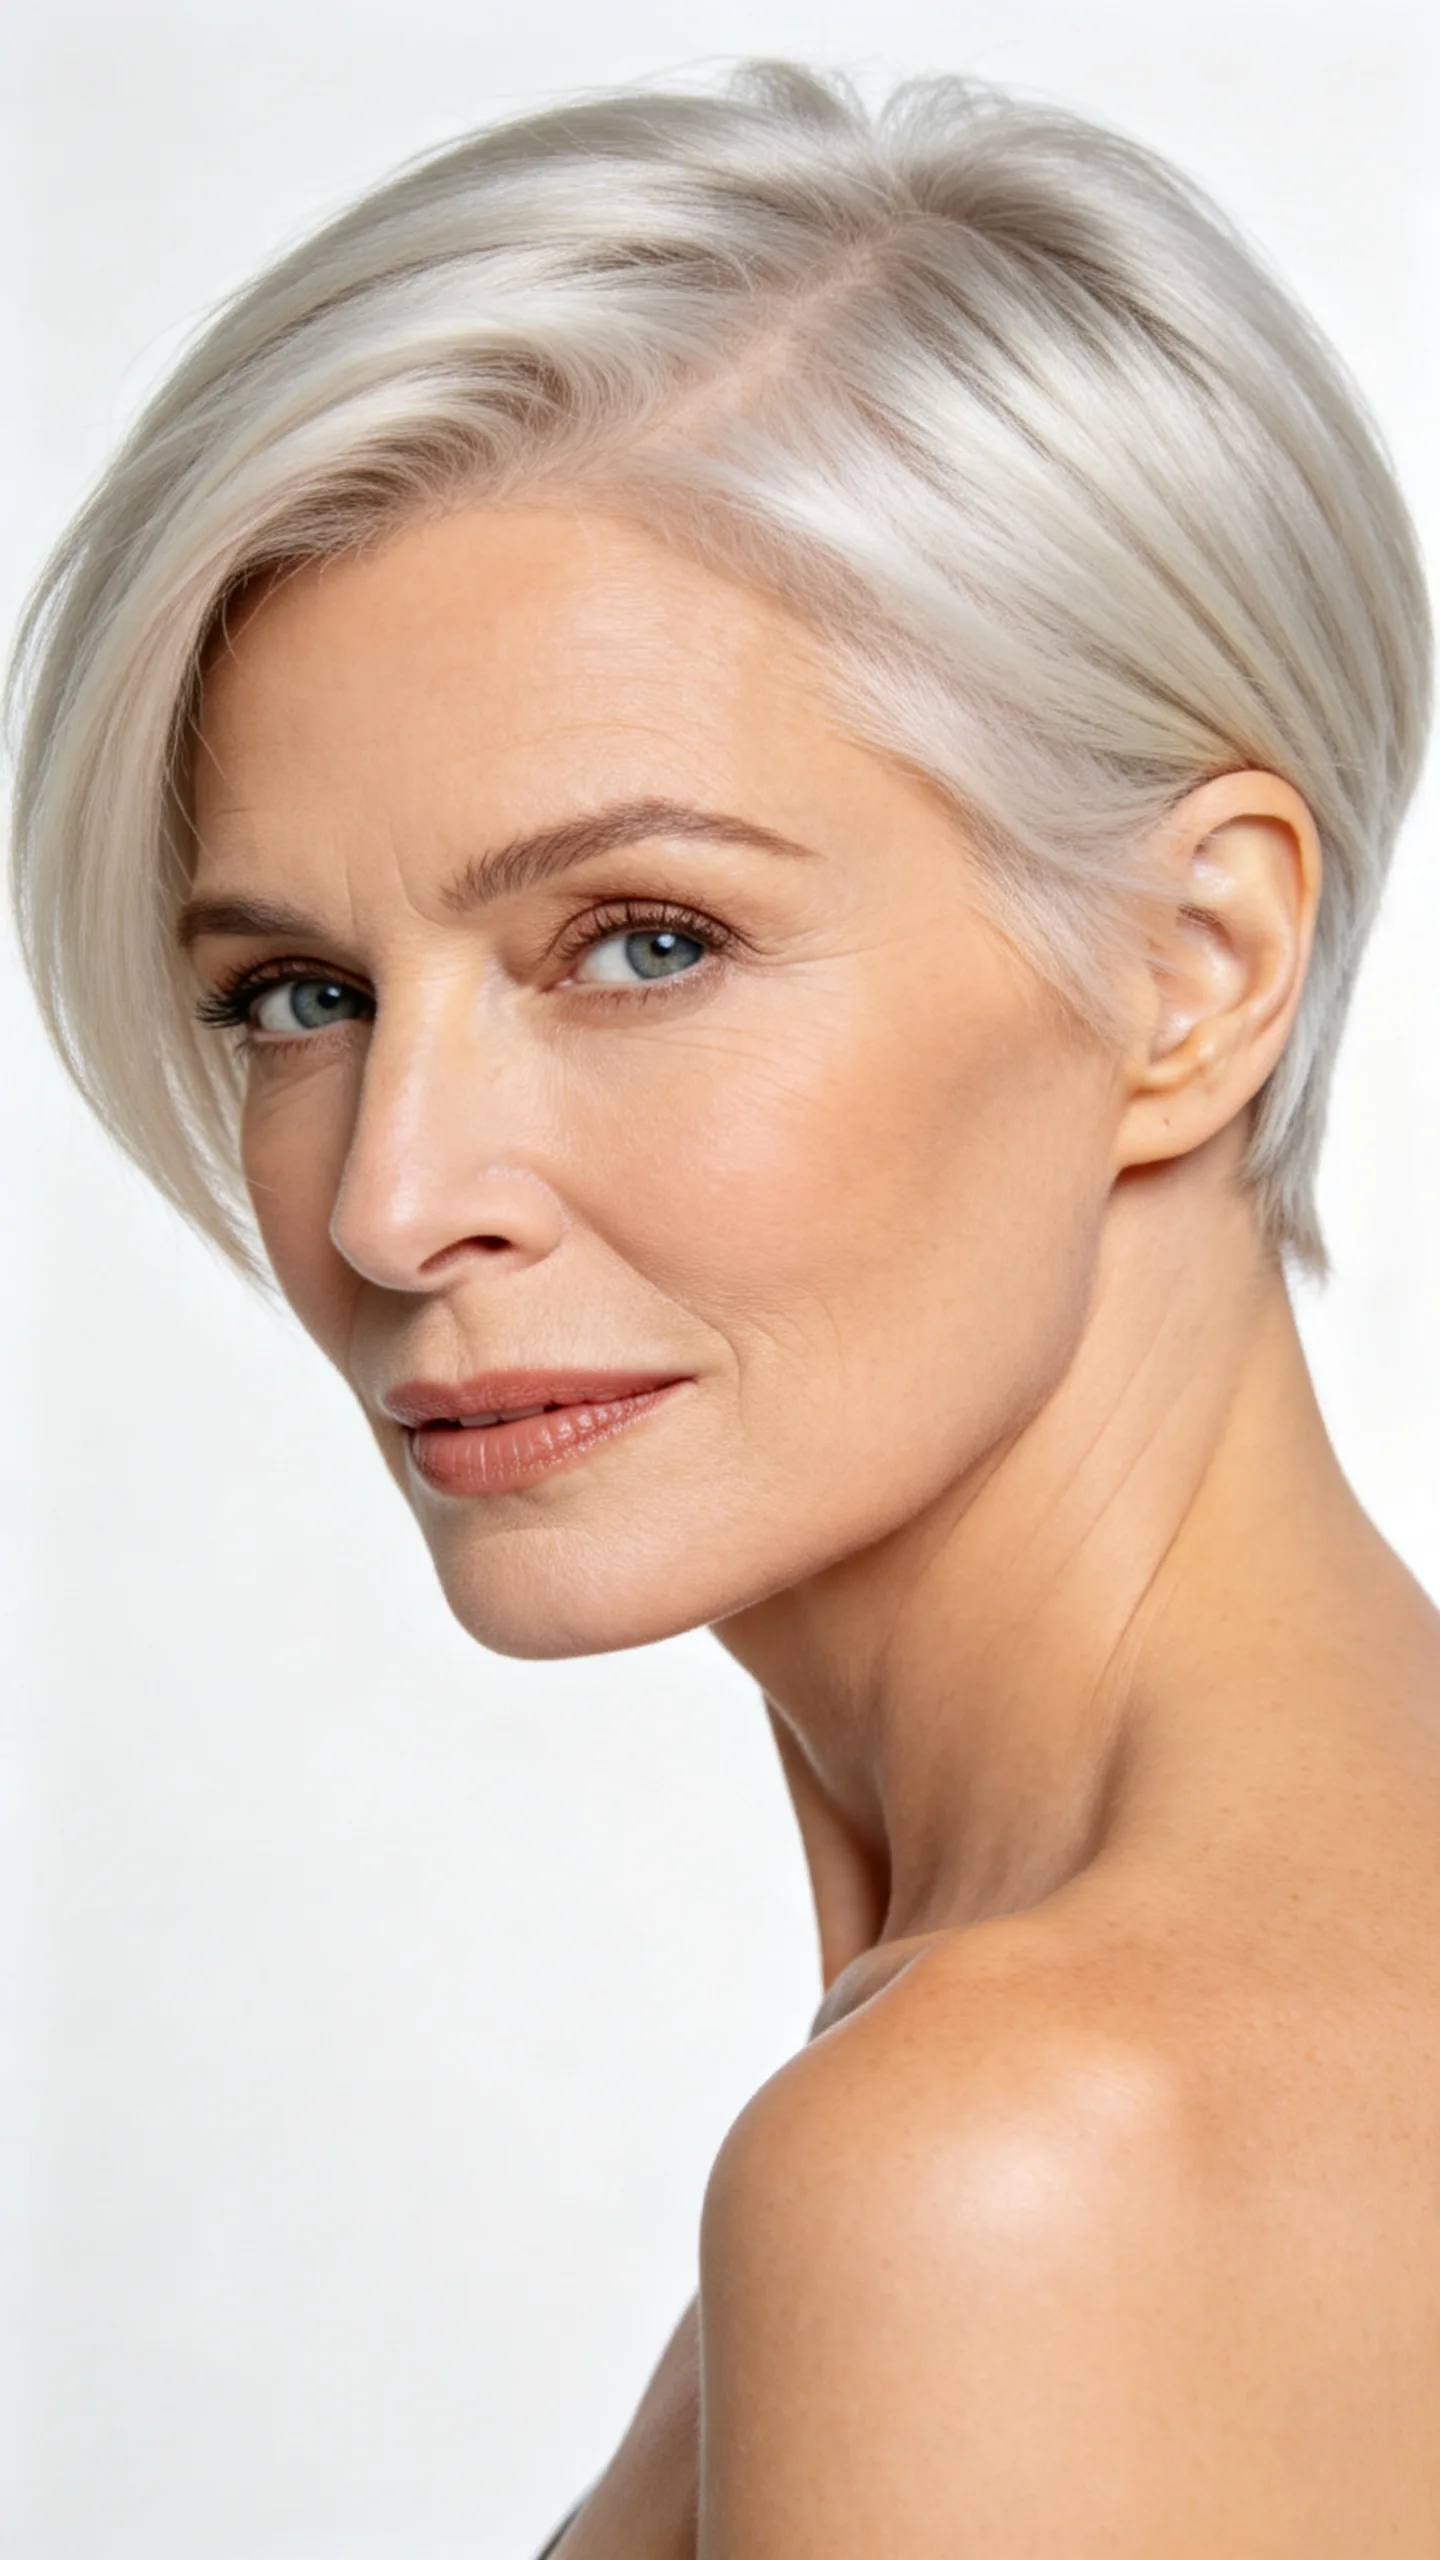
Closely graduated layers can give fine hair a fuller outline without requiring heavy styling products. The front is left slightly longer, allowing the layers to overlap around the forehead and upper cheek area.
Use a root-lifting spray before blow-drying with your fingers, directing the hair upward and forward. Finish with a light powder or dry texture spray, avoiding thick waxes that may separate fine strands too strongly.
15. Salt-and-Pepper Pixie with Swooped Bangs
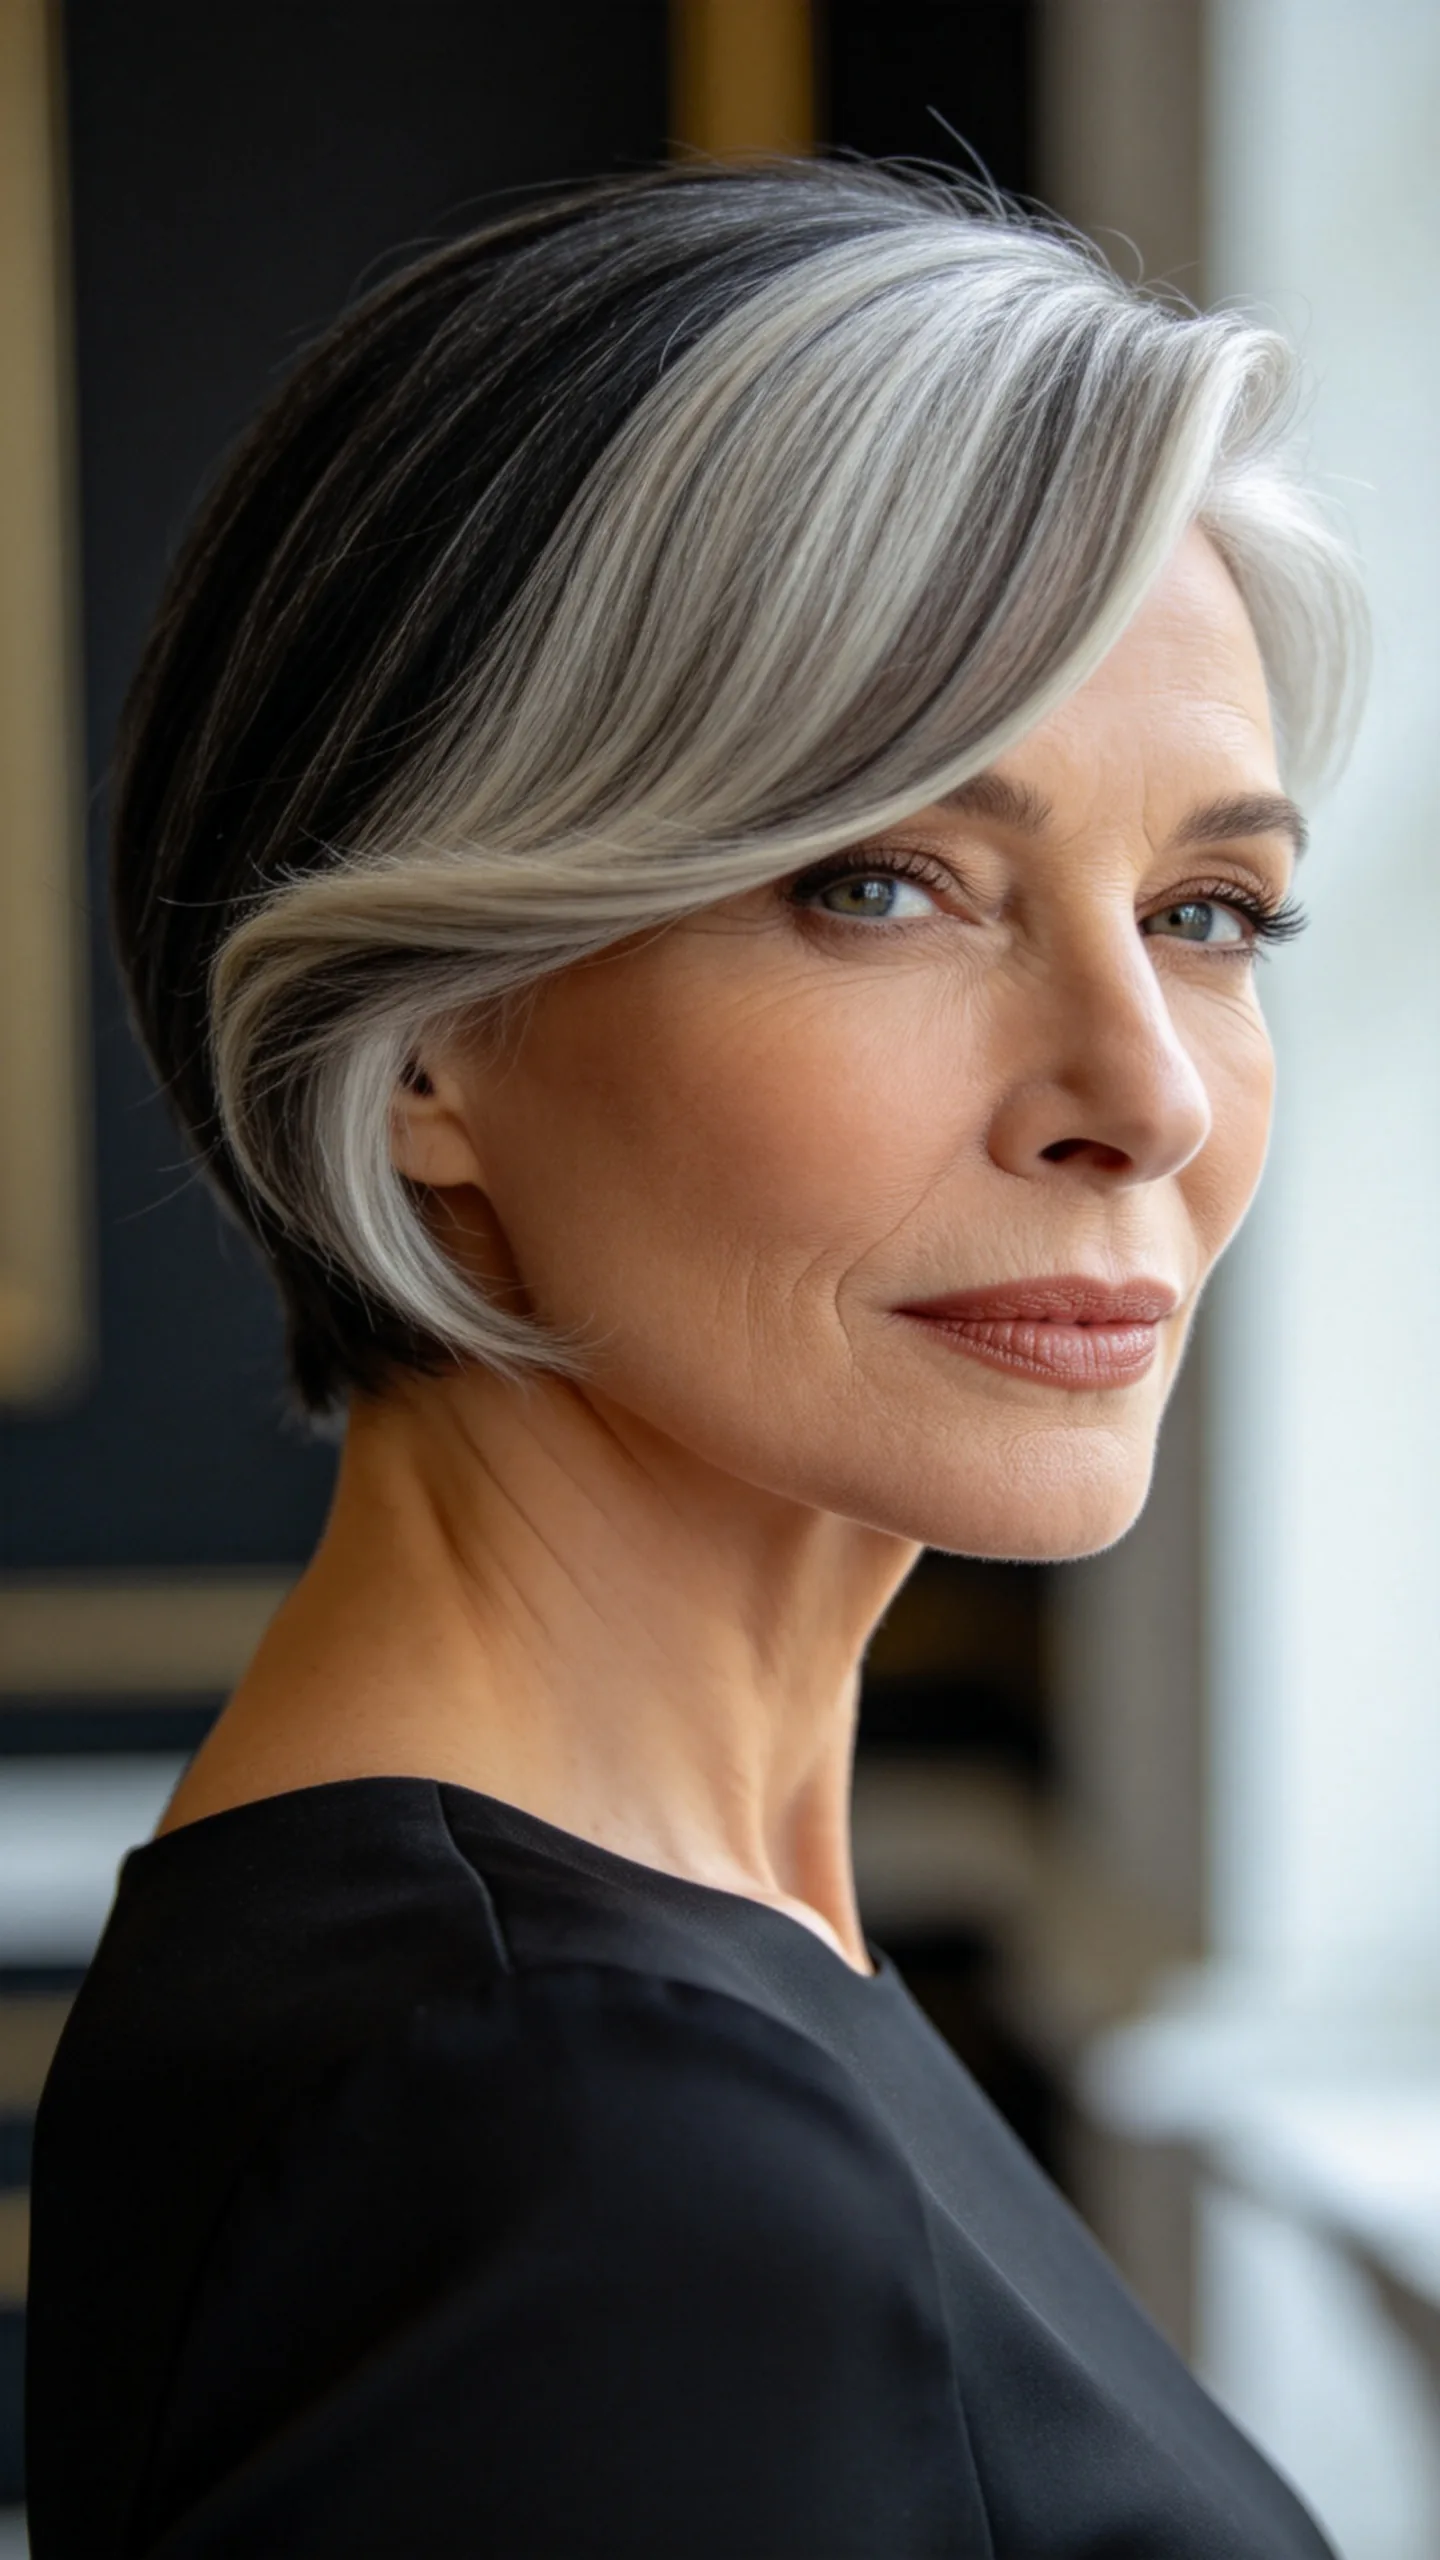
A salt-and-pepper pixie showcases the contrast between darker strands and natural silver. Swooped bangs make that color variation more noticeable while creating a curved line from the part toward the cheekbone.
A shine-enhancing spray can bring definition to both light and dark sections without making the hair greasy. Style the bangs with a round brush and finish with flexible hairspray so they remain movable rather than stiff.
16. Shaggy Pixie with Razored Face-Framing Layers
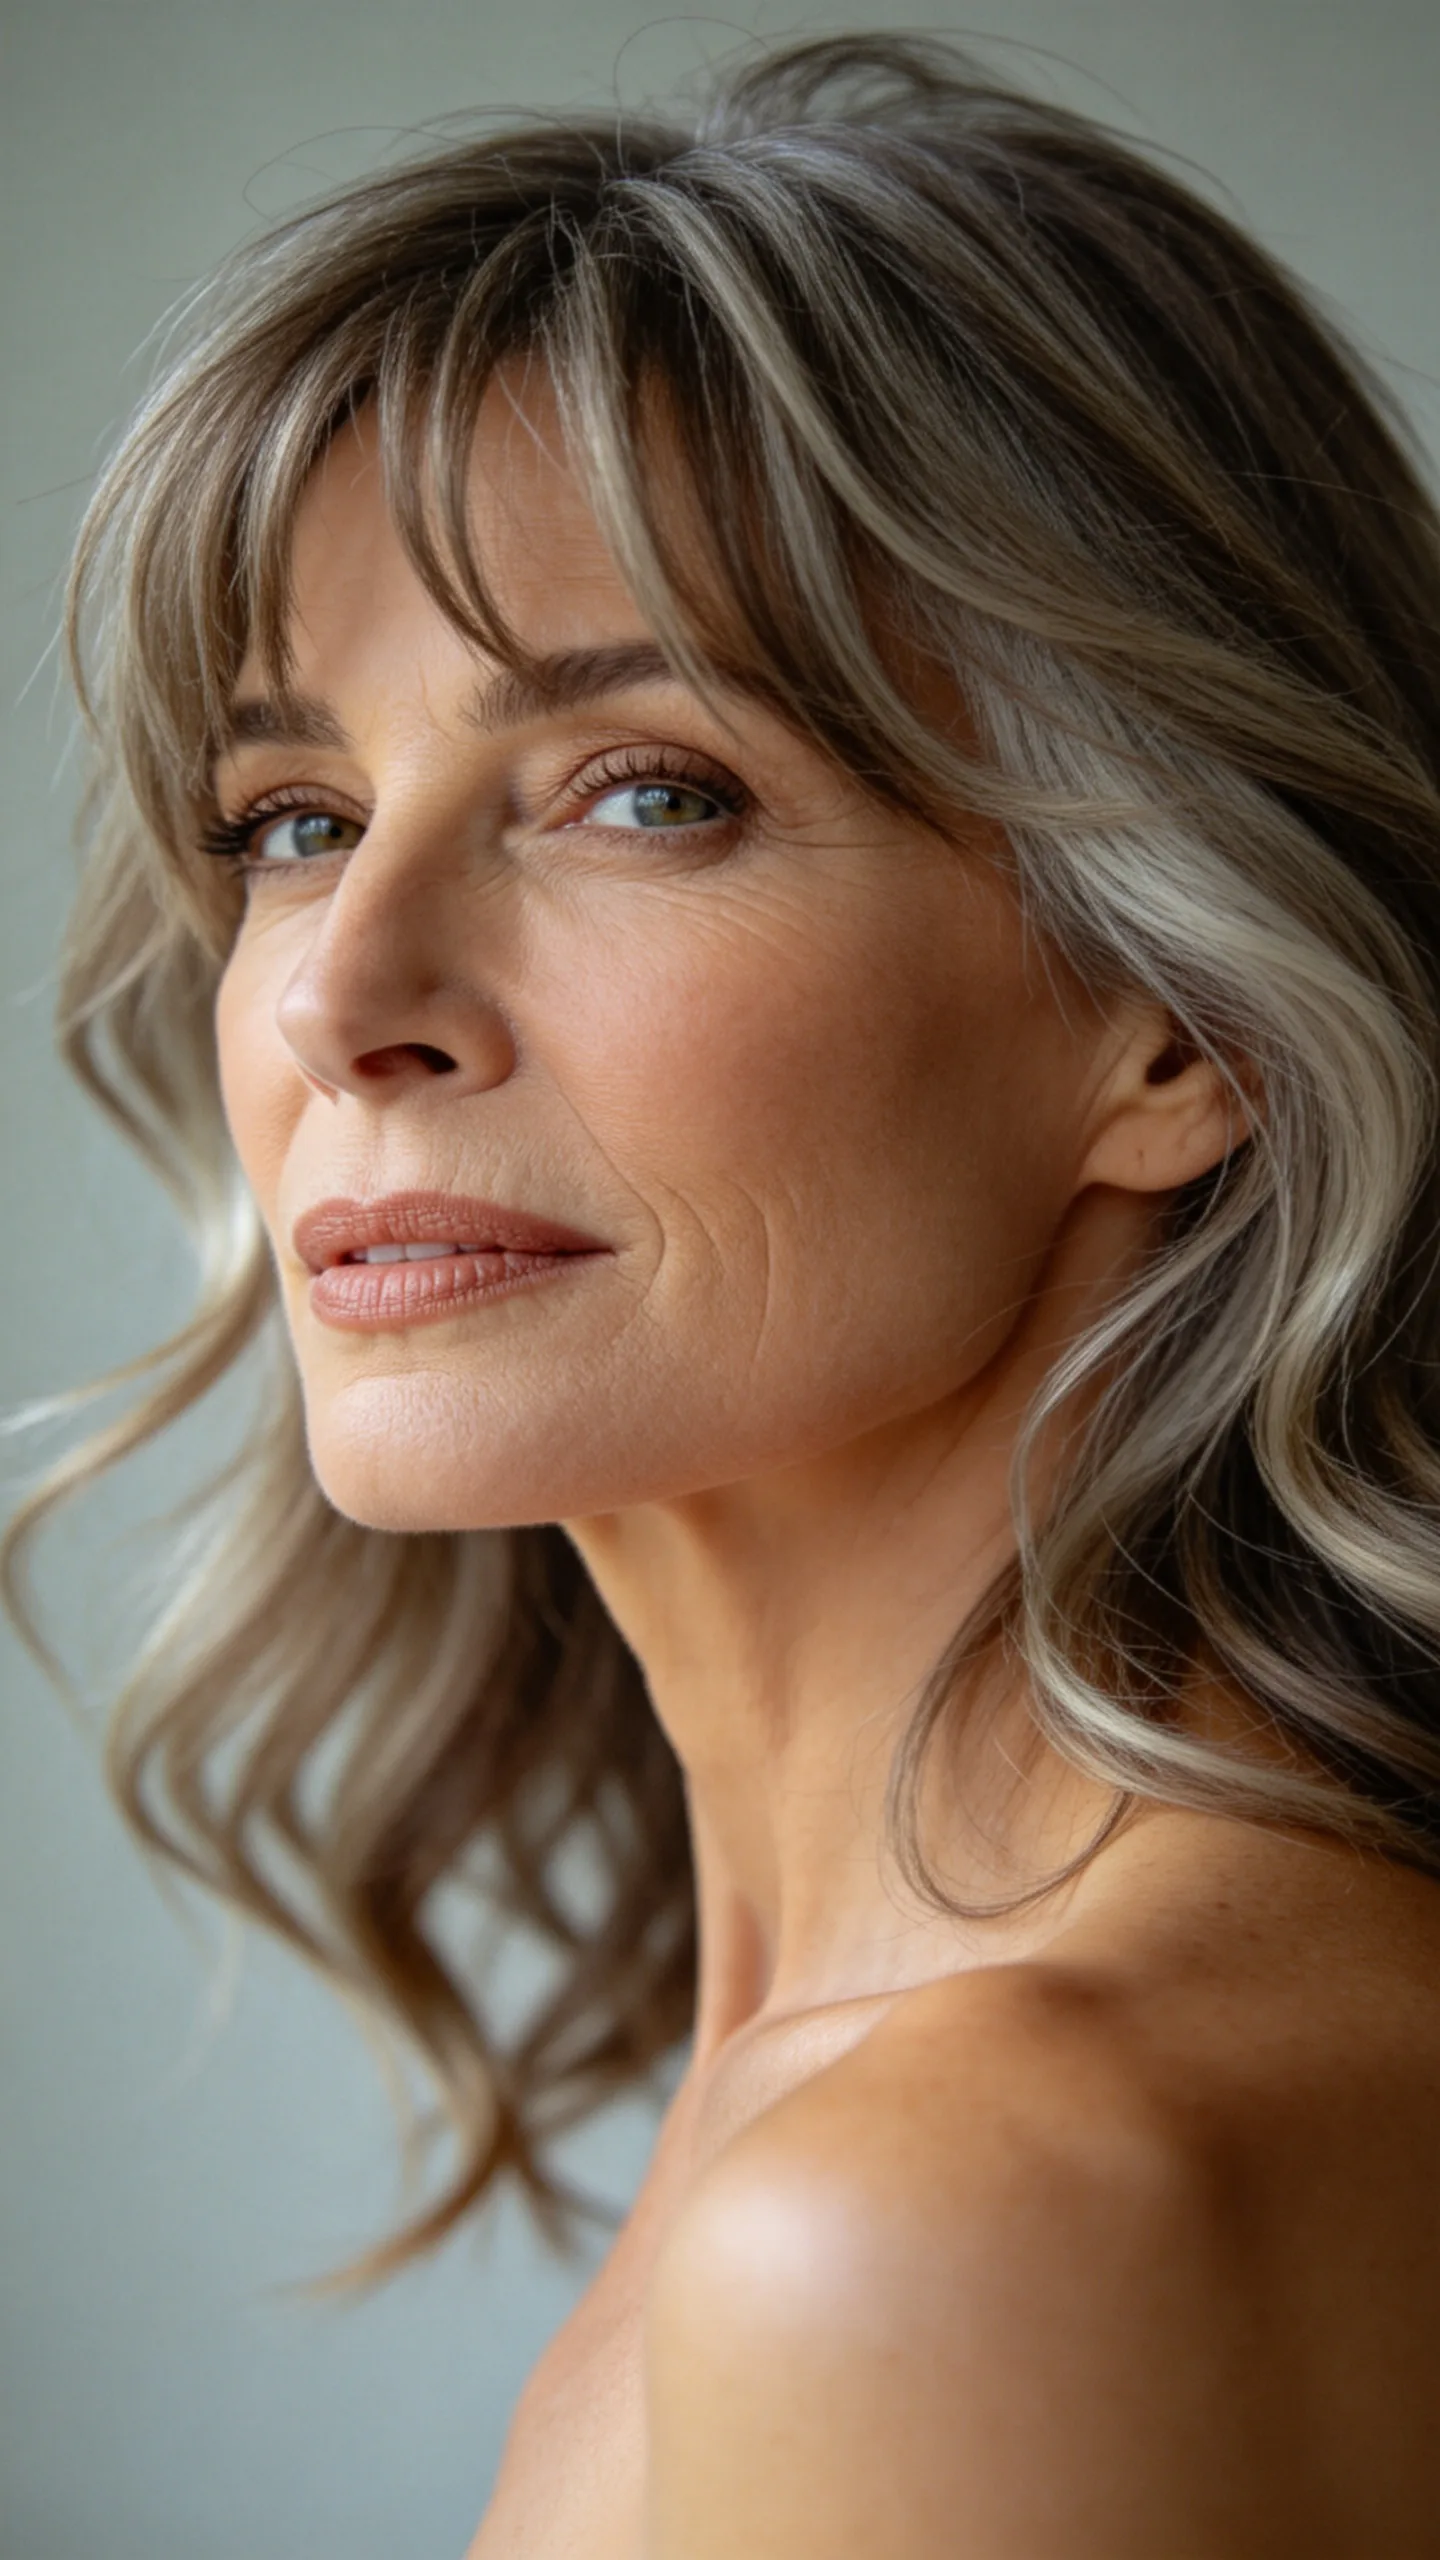
A shaggy pixie uses razored or heavily point-cut layers to create an airy, lived-in texture. Shorter pieces sit at the crown, while uneven front layers fall around the brows, temples, and tops of the cheekbones.
This shape is useful for naturally wavy hair or straight hair that benefits from added movement. Scrunch in a lightweight texture cream, then allow a few front pieces to fall naturally instead of arranging every strand.
17. Sleek Pixie with Tucked Sides and Long Fringe
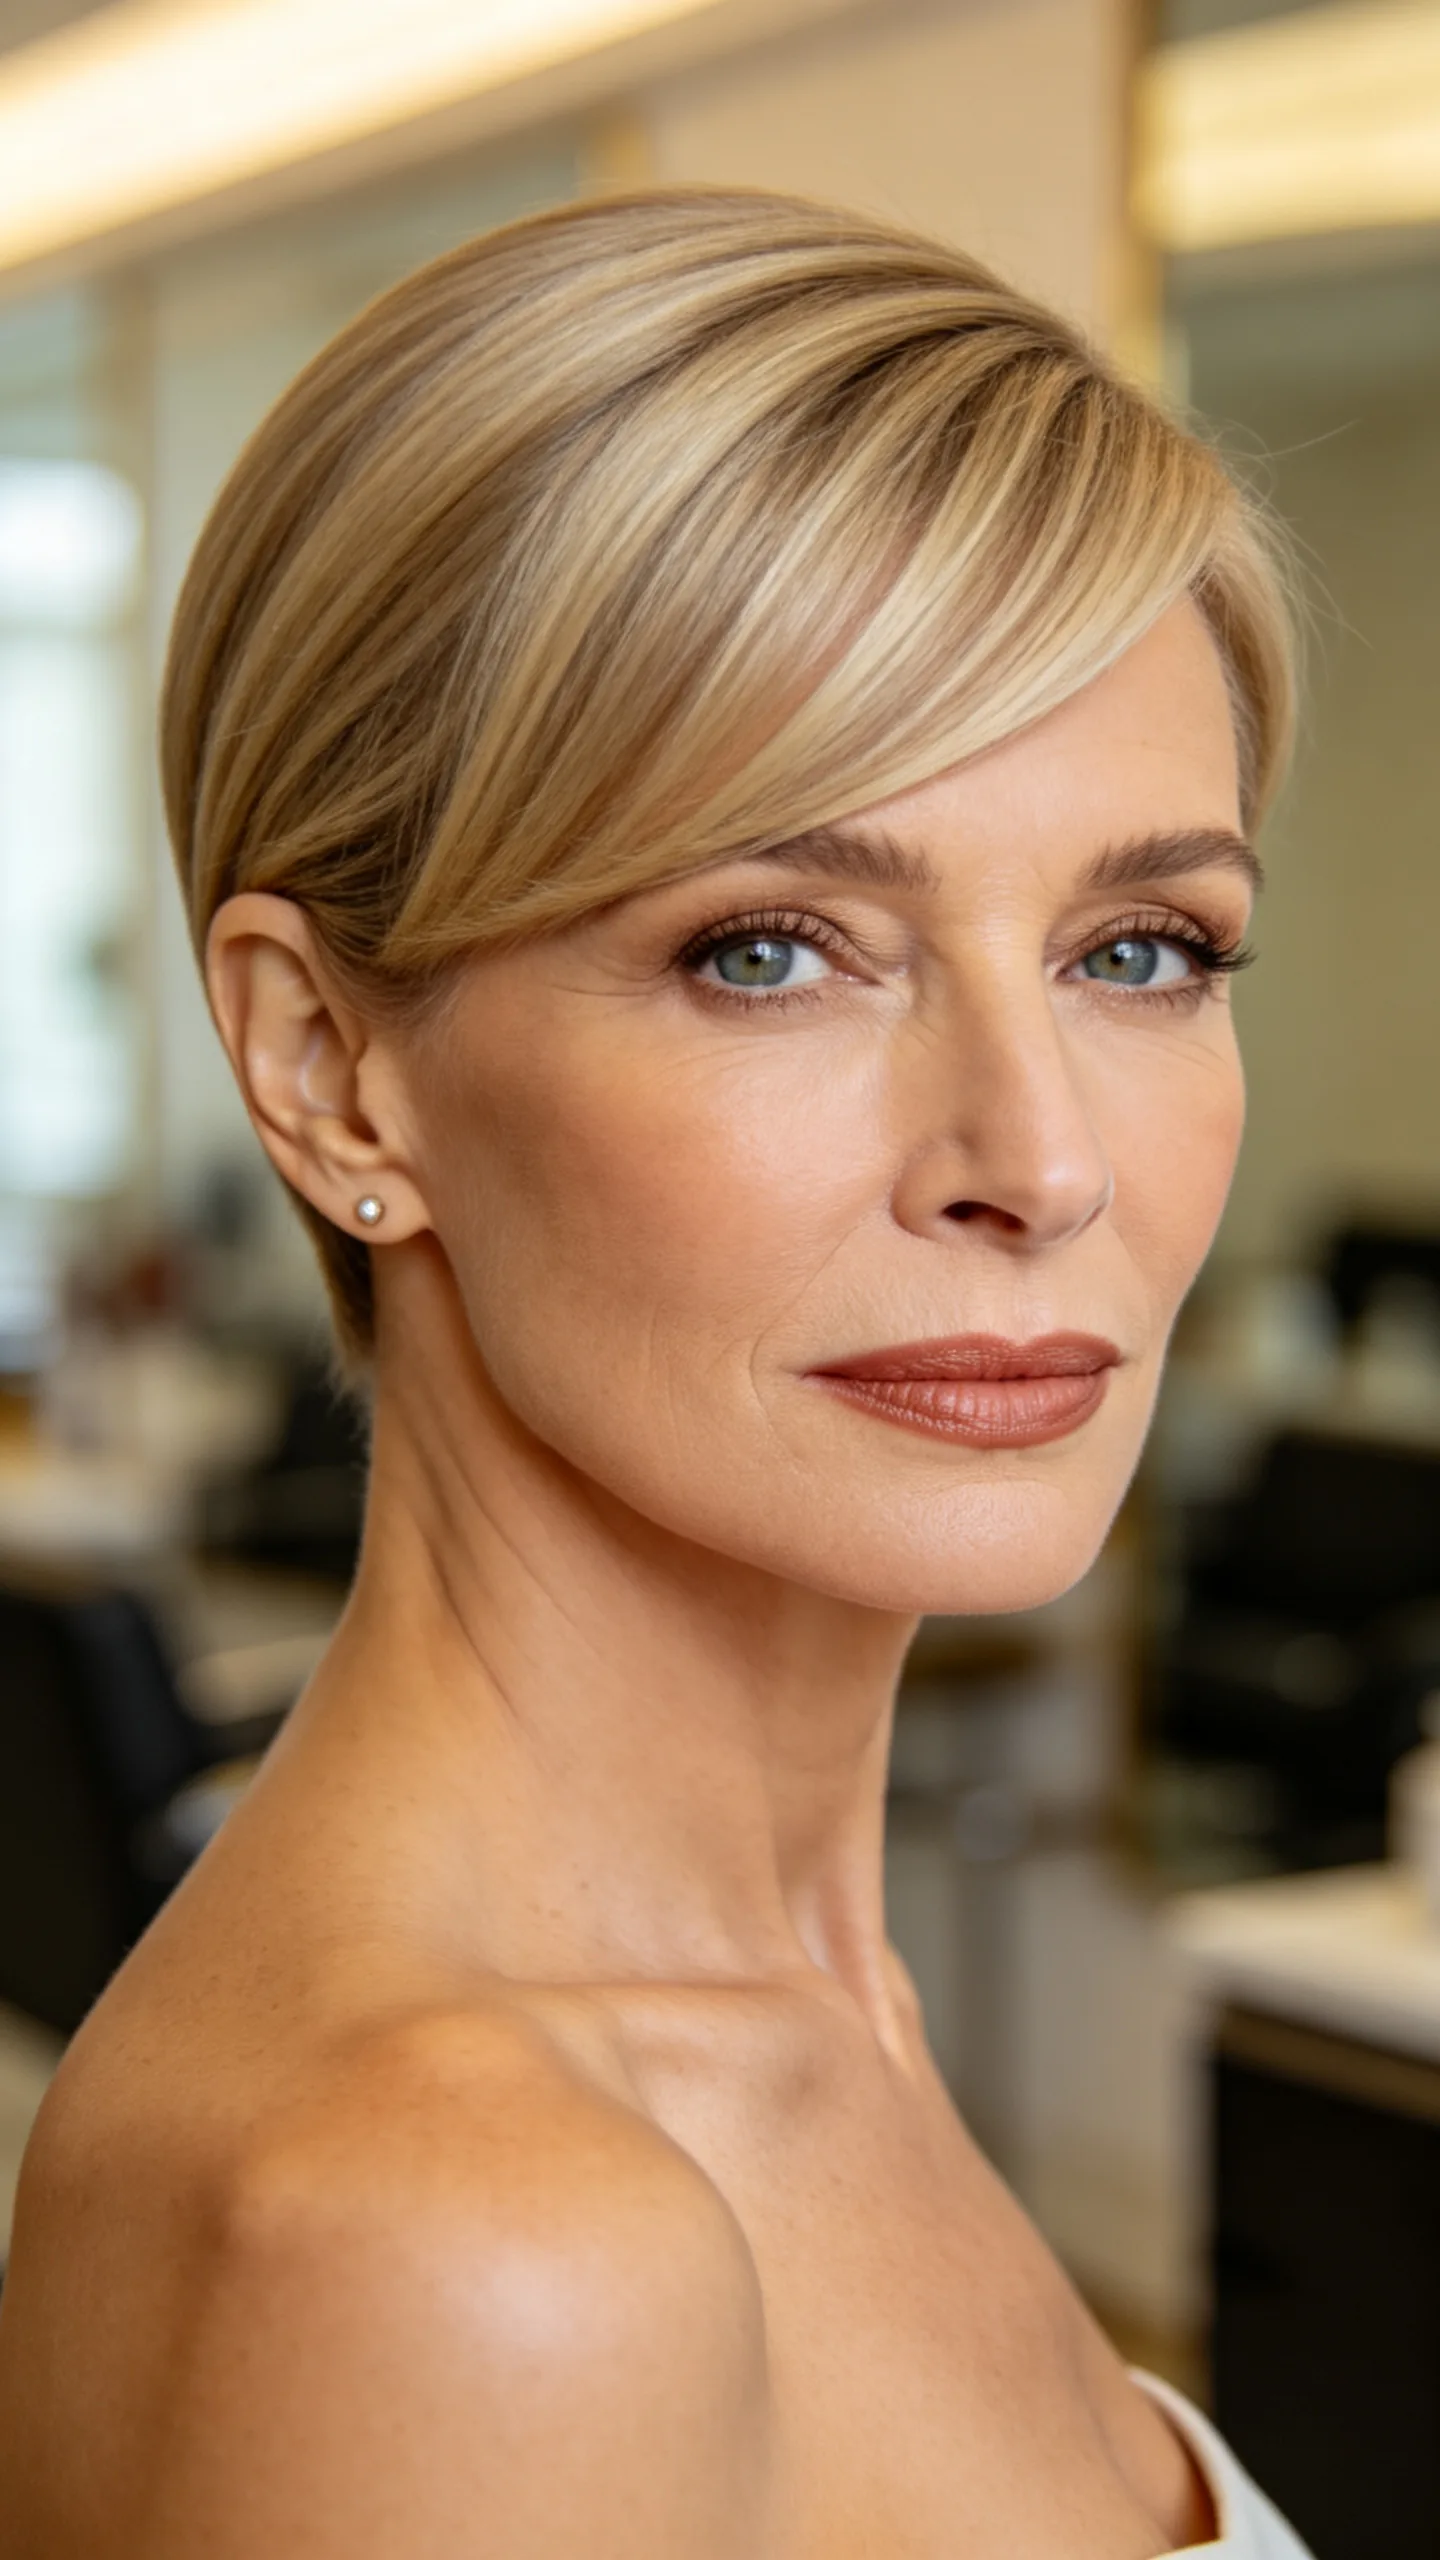
A sleek pixie keeps the sides short enough to tuck neatly behind the ears while leaving a longer fringe across the front. The exposed ears create a clean outline, and the diagonal fringe adds softness near the forehead.
Use a smoothing lotion before blow-drying the hair flat with a paddle brush. Small earrings, slim hoops, or a defined eyeglass frame work particularly well because the tucked sides leave those details visible.
18. Voluminous Pixie with Lifted Face-Framing Layers
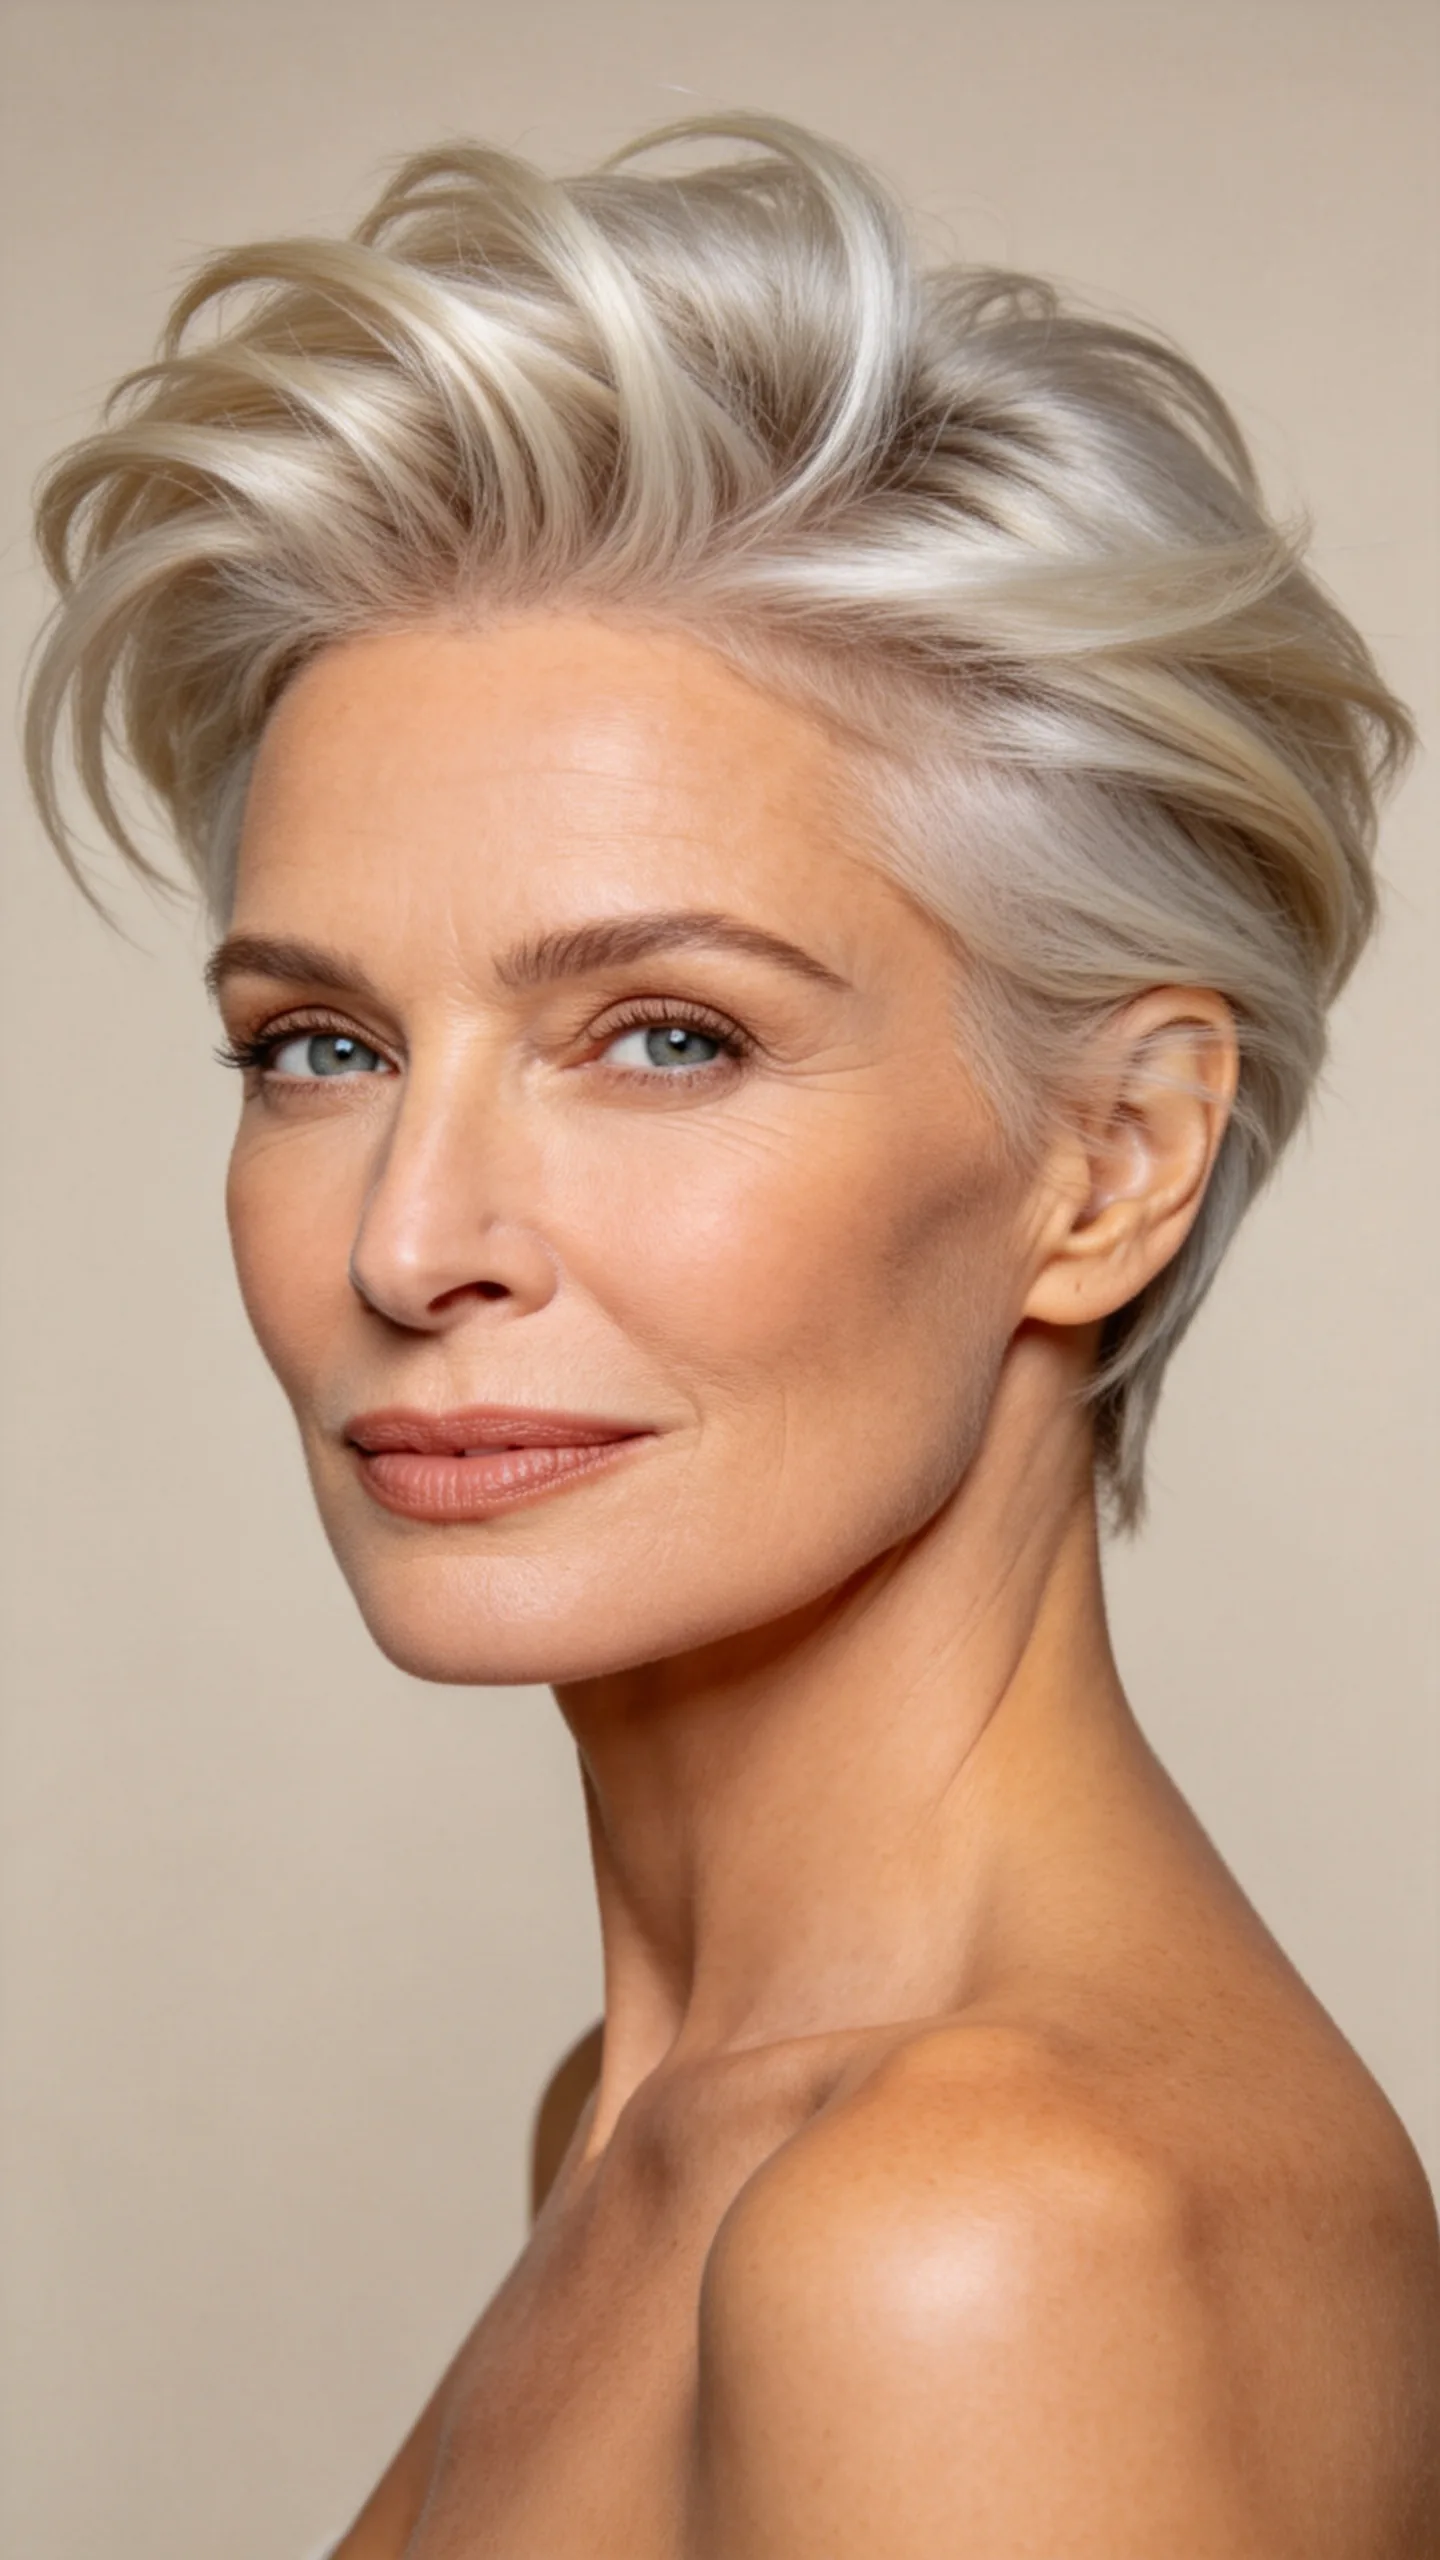
This pixie places volume through the top and front, with graduated layers directed upward and away from the face. Shorter pieces around the temples connect the lifted crown to the sides, avoiding an overly top-heavy silhouette.
Apply mousse at the roots and blow-dry the front with a small round brush, lifting each section before guiding it back. A light mist of workable hairspray will help maintain the shape while leaving the front layers soft enough to adjust throughout the day.